Twitter Delicious Facebook Digg Stumbleupon Favorites More

Wednesday, April 27, 2011

Pineapple Mango Mocktail


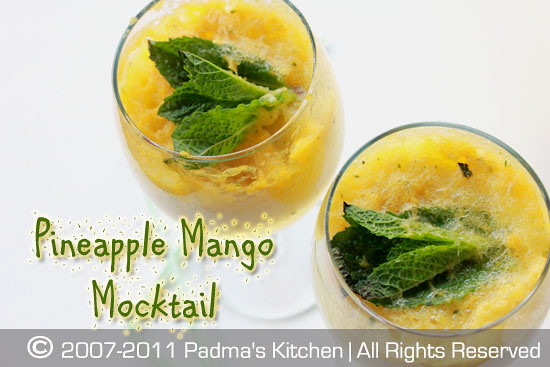
PMMocktail1_550

Summer is already at its peak in India and for us in States its around the horizon. So I thought why not post a mocktail recipe on my blog to cool you down on those sultry summer afternoons. So far I did not post any mocktail recipe on my blog and I don't want to be left behind. First and foremost thing is not to get confused with cocktail and a mocktail, its bit different (not complicated!!), one has alcohol and the other doesn't.

Precisely, mocktail is a non-alcoholic beverage that contains no alcohol. Non-alcoholic mixed drinks (including punches, "virgin cocktails", or "mocktails") are often consumed by people wishing to enjoy flavorful drinks without alcohol, recovering alcoholics, people whose religion restricts alcohol ...

For those of you who love cocktails, but can't or don't want to have alcohol the answer is mocktails. Colorful and full of flavor, mocktails give you all the fun of a cocktail with none of the bite.

I made it for the first time and trust me its 'COOL'... by the way, the recipe is tad simple...few mint leaves, fresh pineapple chunks, mango chunks or mango nectar, ginger ale , salt and ice cubes, that's all you need. The actual step by step recipe will follow but if you have these ingredients in your kitchen then you can pretty much make this cocktail in no time. For those who don't find Ginger Ale, replace that with Club soda or Sprite of 7 Up.

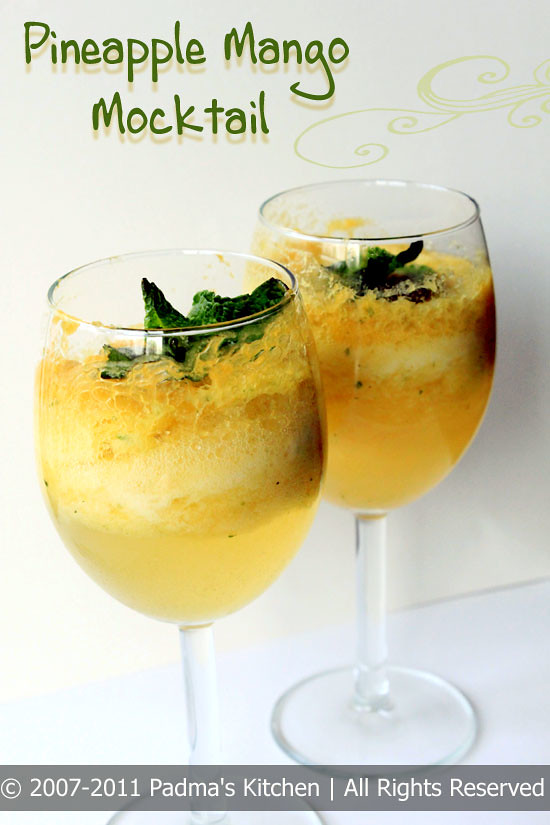
PMMocktail2_550

Pineapple Mango Mocktail with Mint

Source: My Own
Prep time:10 mins
Serves: 4

Ingredients:
1 C of fresh Pineapple chunks
1 C of mango nectar
3-4 crushed mint leaves
1 can (8oz) Ginger Ale(or club soda/Sprite/7Up)
4-5 ice cubes
1 t salt

Method
  • The first and foremost things is to use freshest ingredients available, though if fresh fruits are not available you can use canned pineapple.
  • Tear the mint leaves and crush in a the glass to serve or simply blend it with the fruits in a blender.
  • Add the crushed mint leaves, pineapple chunks, mango nectar, salt and blend it for 30 secs.
  • Pour the entire contents with ice cubes into the cocktail shaker ( I used normal pasta jar) shake it vigorously for 2 mins or so and pour into the glasses.
  • Top it with Seagram's Ginger Ale to get the frothy effervescence into your mocktail, you can see it in my pictures above.
  • Serve chill.


I am sending this recipe to event: Fun N SUN on Radhika's Tickling Palates.


Friday, April 22, 2011

Simple Egg curry with a spice twist!!

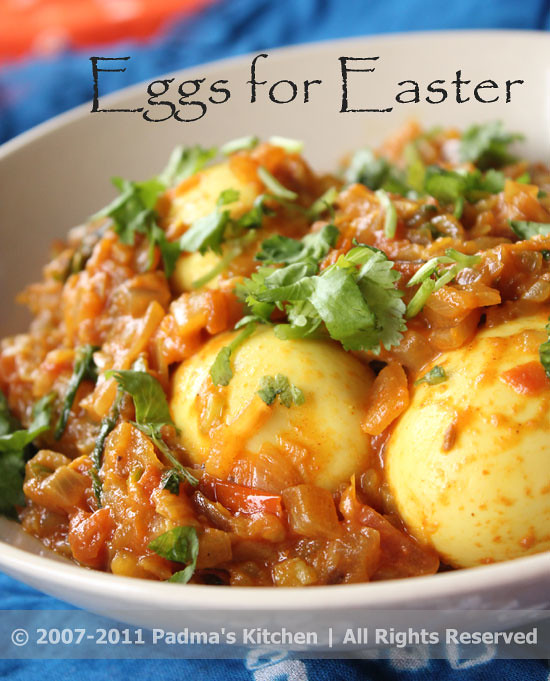
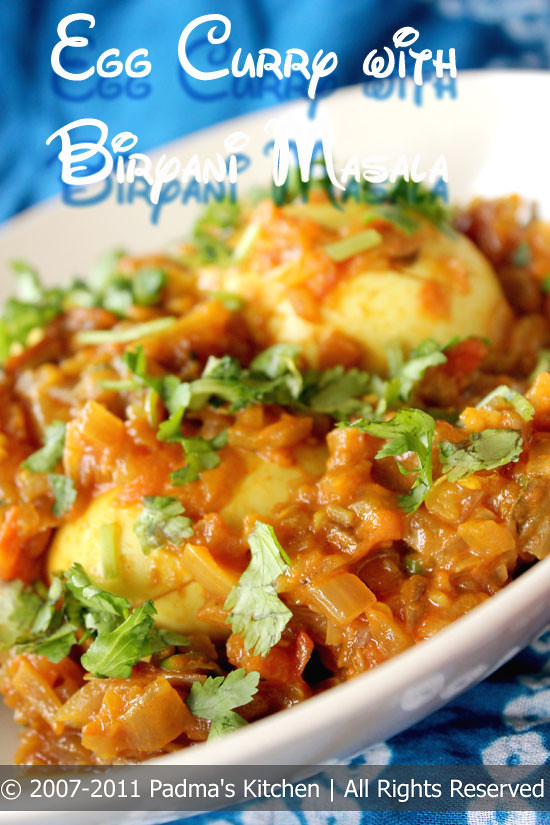
EggCurry3_550

This is very simple yet interesting curry made with hardboiled eggs, tomatoes, onions and green chillies. The simplest ingredients readily available in our kitchen across the globes. When you are stuck in the kitchen wondering what to prepare for the weeknight dinner or weekend lunch. The combination of tomatoes, onions and green chillies with a dash of the very popular "Biryani Masala" (Indian spice mix) gives out spicy, tangy hot coating to the bland eggs. This curry is best eaten with freshly cooked basmati rice. But there is no end to your imagination, you can have it with pasta too!

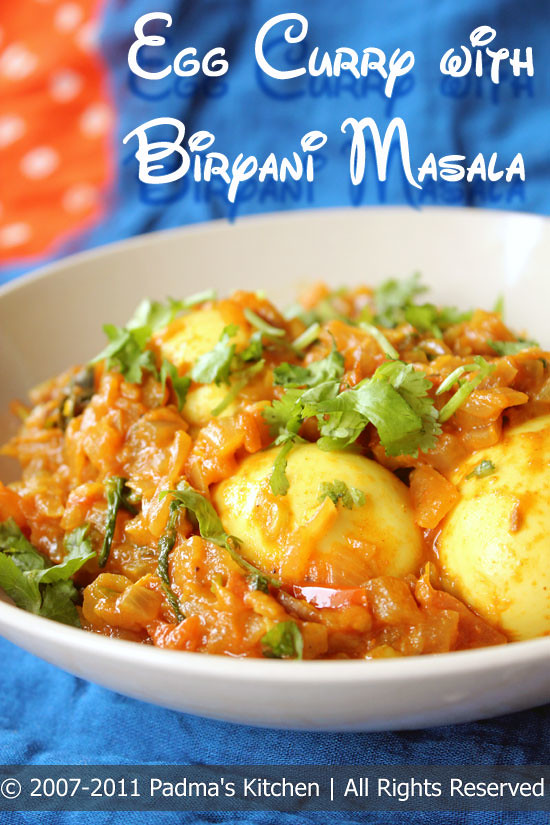
EggCurry1_Potrait550


When you are simply very lazy to cook any fancy meal for your family then this curry come to the rescue. If you are a rice lover, you will love to have it over and over again, trust me!!

Egg Curry with Biryani Masala

Source: My Own
Cuisine: Andhra Cuisine
Prep time:20 mins
Cooking time: 20 mins
Serves: 4

Ingredients:
4 Hardboiled Eggs
1 C red onions, finely chopped
2 green chillies, cut lengthwise
2 C grapevine tomatoes, finely chopped
½ t turmeric powder (haldi)
1 t red chilli powder(reduce to your spice level)
1 t paprika powder for color
1 t Aachi biryani masala powder
1 t ginger garlic paste
2 t cooking oil, I use olive or canola oil
salt as per your taste
½ C water
non-stick pan or kadai for cooking
2 T chopped cilantro, for garnish
Method:
  • Boil 4 eggs in 3 cups of water or till the eggs are submerged fully in water. For eggs to be removed easily from its shell, check this procedure: Boil eggs for 10 mins on medium high and turn off the flame. Let it stand in the boiled water for 5 more minutes and then cool them in cold water for 3 minutes. Following this method will give you a bright yellow, firm egg yolk and a clean eggwhites, easy to remove shell instead of the chipped ones. You can do this for deviled eggs too.
  • For the curry, heat oil in a kadai or pan. Let it heat through and start adding curry leaves first and then red onions. Add a pinch of salt to let the juices from onions come out and fry till they turn pinkish in color.
  • Add ginger garlic paste, green chillies and chopped tomatoes and saute it for 10 minutes. Tomatoes should turn into gravy consistency then add all the spices and powders like turmeric powder, chilli powder, paprika powder, biryani masala and salt. Fry for another minute or two and then add ½ cup water. Now close with a tight lid and let the curry cook.
  • Meanwhile make slits on the hardboiled eggs with a paring knife so that way the curry get into the eggs halfway. Add these eggs tot he curry and cook for another 5 mins or so.
  • Check for salt and garnish with chopped cilantro. Serve with cooked rice or pasta.

EggCurry2_Potrait550

Saturday, April 16, 2011

Pedakka's Chicken Fry

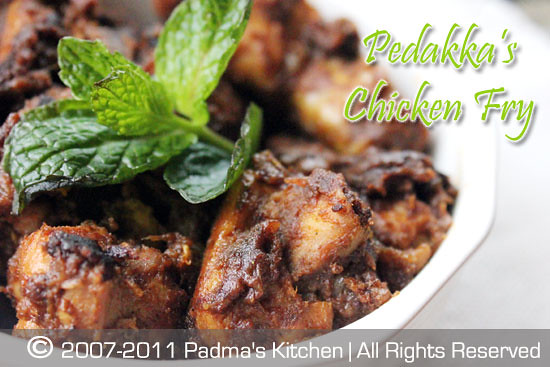
PChickenFry1_550

Pedakka's Chicken fry is one of my all time favorite recipes which I cook every now and then. My last year India trip gave me chance to learn some family favorites from my sisters, mother and Pedamma (mother's older sister). A little info about my Pedakka, Laxmi Akka is a great cook, likes to feed the whole family, we call her "Annapurna Thalli" one who feeds sumptuously. What ever way she cooks turns out so delicious. She tells us lot of tips and tricks in cooking and home remedies. She is like an encyclopedia for me, I always refer to her and my mother.

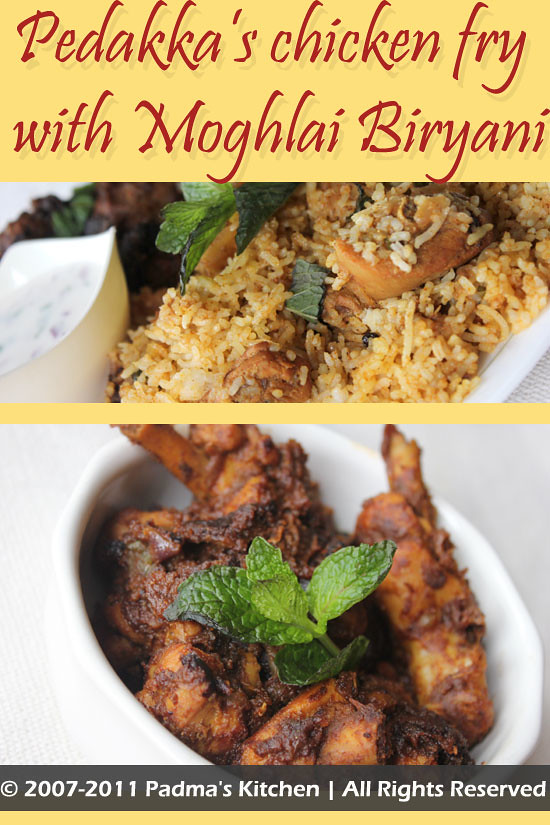
This Chicken fry recipe is one from her recipe bank which I am darn sure that if you cook it her way turns out so good you will receive all the applause for it!! I promise you will never regret making this chicken fry at potlucks or gatherings. A simple yet tasty mouthwatering recipe is very appropriate for the coming Easter! I made this for our Sunday afternoon lunch last week along with Knorr's ready to cook Moghlai Biryani. If you ask me to review about this ready mix I will say its 1 out of 5, It is nothing compared to their Hyderabadi Dum Biryani ready mix they have.


PChickenFry3_Potrait

Chicken Fry

Source: My Pedakka
Cuisine: Andhra Cuisine
Prep time:10 mins
Cooking time: 30-40 mins
Serves: 2

Ingredients:
1 pound Chicken thighs and legs
1 C red onions, diced
4 green chillies, cut lengthwise
2 bay leaves
2 inch cinnamon stick
2 cloves
2 cardamom
½ t turmeric (haldi)
2 t red chilli powder(adjust according to your spice level)
1 t paprika powder for color
1 t garam masala
2 t Dhana -Jeera powder (cumin-coriander powder)
2 t ginger garlic paste
7-8 curry leaves
2 T cooking oil, I use olive or canola oil
salt as per your taste
¼ C water
non-stick pan or kadai for cooking
Method:
  • First and foremost cut the chicken into bite size pieces excluding the leg portions. Add turmeric powder to it, mix well and rinse with water.
  • Heat oil on medium high, add bay leaves, 2"cinnamon stick, cloves and whole cardamom, let it fry till the aroma of the spices come out. To this add curry leaves, length wise slit green chillies and onions. Fry till the onions turn light pink in color.
  • Add the cleaned and rinsed chicken pieces, fry for another minute so that all the spices and onions mix well with chicken.
  • Add water, salt and place the lid, reduce the flame to medium low and let the chicken cook. it may vary from 10 to 15 mins. You will notice the chicken turns white and opaque then open the lid, turn the flame to medium high.
  • Now add the ginger-garlic paste, cumin-coriander powder, garam masala powder, red chilli powder. Let the chicken cook still further till the water evaporates and lastly add paprika powder.
  • By now the fry would turn dark brown in color and the chicken will be golden brown in color. You will know when its done! You won't resist to taste it at this stage. Check for salt and spices and add accordingly. If it is too spicy sprinkle some freshly squeezed lemon juice on the chicken fry.
  • Enjoy this with any Biryani. I made Moghlai Biryani from Ready to cook Knorr Mix. If you are interested, you can make simple Green Peas Pulav or Egg Dum Biryani from my blog (click on the titles to check the recipes).
I am dedicating this post to my favorite Pedakka! Thanks akka for all your yummy recipes, love ya!!

Tuesday, April 12, 2011

Sri Rama Navami Prasadam

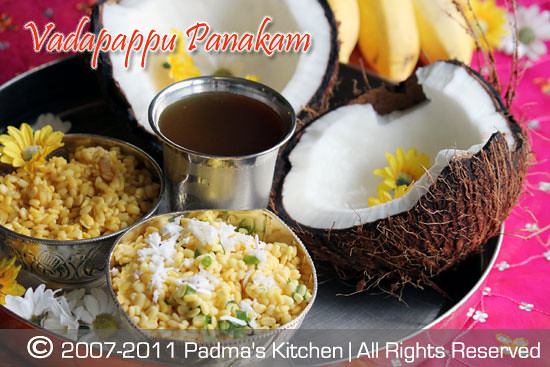
VP_550
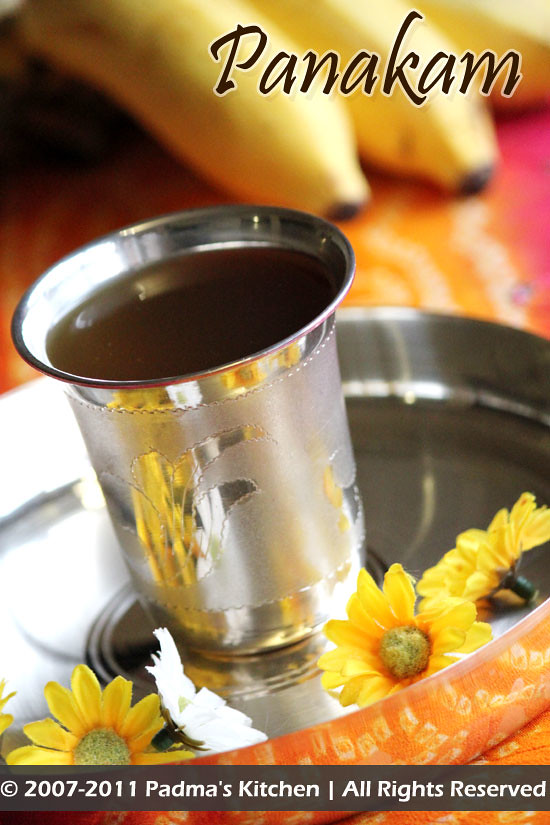
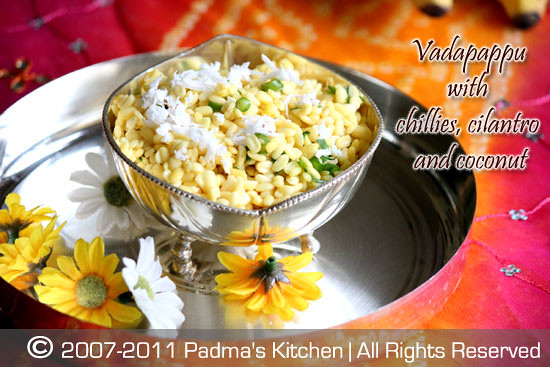
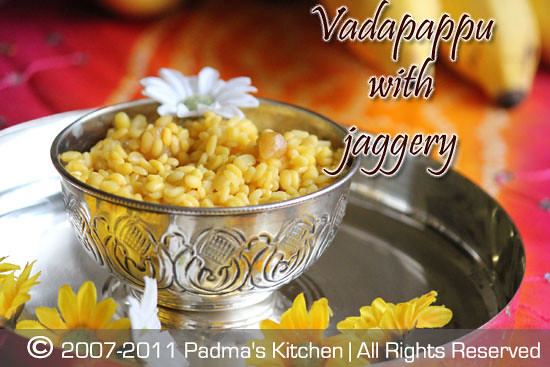
Two type of Vadapappu and Panakam for Sri Rama on occasion of Ramnavami


Padma's Kitchen wishes her readers, visitors, friends and family a very Happy Sri Rama Navami. May the Lord shower his blessings upon us.

Sri-Ramnavami , the celebration of birth of Sri Rama birth falls on the ninth day (navami) of the Chaitra masam(Hindu Lunar month). The festival commemorates the birth of Rama who is remembered for his preperous and righteous reign. Ramrajya (the reign of Rama) has become synonymous with a period of peace and prosperity. Mahatma Gandhi also used this term to describe how, according to him, India should be after independence.

At midday, when Lord Rama is supposed to have been born, a special prayer is performed. In northern India especially, an event that draws popular participation is the Ramnavami procession. In Southern India we make this special prasadam food to offer Sri Rama, the recipe follows.

"As promised here are the pictures of Naivedyam "


Panakam_550

Source: My Mother

Cuisine: South Indian, Andhra Cuisine
Prep time: 1.5 hours
Servings: 4

Panakam

Ingredients:
2 C Water
½ C grated jaggery/belam/gud
1 t crushed black pepper
½ t cardamom powder/elaichi powder
Method:
  • Dissolve the grated jaggery(bellam) in water and add the rest of the ingredients.
  • Take care while preparing the prasadam by not tasting it before offering it to God.
  • After puja is completed have panakam with vadapappu.


Vadappapu1_550
Savory Vadapappu

Ingredients:
1 C Moong dal (split yellow moong lentils)
1 small green chilli, finely chopped
2 T grated coconut
1 T chopped cilantro/kothmir leaves
a pinch of salt
Method:
  • Soak Moong dal for 90 mins to 2 hours in 2 cups of water. Rinse thoroughly 2 to 3 times and drain the soaked dal.
  • To this add the rest of the ingredients and offer to God first and then have the prasadam.

Vadappapu2_550
Sweet Vadapappu

Ingredients:
1 C Moong dal/ yellow split moong lentil
½ C grated jaggery/belam/gud
Method:
  • Soak Moong dal for 90 mins to 2 hours in 2 cups of water. Rinse thoroughly 2 to 3 times and drain the soaked dal.
  • To this add grated jaggery/ bellam, mix well and offer to God first and then have the prasadam.

Thursday, April 7, 2011

Moong Dal Soup

Ever since my little one 'Anshika' started eating solids I was in search of tasty, delectable and appealing baby food to make eating more interesting for her. Some days she eats and some days she doesn't and moreover making your baby eat is always time taking process but sometimes very challenging and frustrating too. Cooking homemade baby food became very interesting when Anshika started liking new foods.

I started gathering recipes from friends, experienced moms, my mother, older sisters in the family, books on baby food for over a year now, reinventing and recreating the old recipes with a new twist was like experimenting flavors in your lab (kitchen). So I thought why not introduce my new line of recipes especially for babies,toddlers and kids on Padma's Kitchen. You can find many interesting baby food recipes going forward, that's my promise to all the new parents, Good Luck and Happy Parenting!!


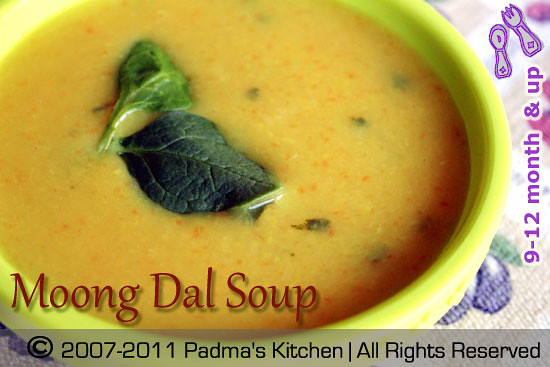
MDSoup_550
Baby Food - Moong dal soup with Carrot and Spinach

Moong Dal Soup with Carrot and Spinach is a hearty soup which is rich in protein from lentils, Vit A, iron from spinach and Vit A , beta carotene from carrot. You can feed this soup to babies from 9 months and up. As the age of the baby goes up you can make this soup even chunkier and add more veggies to it. If your baby is older than 18 months you can mix it with some cooked rice and feed. It is a very common recipe in India and moong dal helps with digestion and produces less heat to the body compared to any lentils.

Source: My Mother
Cuisine: Indian
Prep & Cooking time: 20 mins
Servings: 3

Ingredients:
½ C split yellow moong dal (lentil)
½ C shredded organic carrot
handful of spinach, roughly chopped
a pinch of turmeric powder/haldi
a pinch of crushed black pepper
1½ C baby water
salt to taste
2 tsp of ghee (clarified butter)

Method:
  • Rinse the split yellow moong dal and soak it in one and half cup of water.
  • Meanwhile shred or grate the carrot and clean, also rinse and chop the spinach.
  • If you have a pressure cooker, combine all the ingredients except salt and ghee. Pressure cook till 4 whistles, takes around 15 mins.
  • If you do not have a pressure cooker, cook it in a medium sauce pot with double the water over medium heat for 30-40 mins or till the lentils are tender.
  • When its done add some salt and ghee and feed your baby when the soup is still lukewarm.
  • Consistency of the soup should be easy flow like tomato soup. As the age of your baby goes up you can thicken it by adding less water and also some spice too, like garlic or ginger!
  • You can store the leftover in refrigerator and feed it in 2-3 days, but heat in microwave or stove top every time you feed your baby. You may notice that the dal solidifies once you cool it so you may add some water to loosen up but at the same time add some salt.
  • You can also feed this soup with cooked rice to babies older than 1 or 1½ year and who are eating chunkier foods by now.
These homemade baby food recipes are simple and rewarding to make - become head chef for a very special little customer!

Related Posts with Thumbnails