Saturday, April 11, 2020
Spicy Red Pepper Karam
Monday, February 2, 2015
Sweet and savory vegetable cutlets
Prep time: 12 mins
Cooking time: 10-12 mins
Serves: 6 servings
3 potatoes, boiled
2 carrots, boiled
1 small beetroot, boiled
1/4 C corn, boiled
1/2 t ginger garlic paste
2T chopped cilantro
1/4 t onion powder
1/4 t cayenne powder, mirchi powder
1/4 t turmeric powder, haldi
1/4 t garam masala
Salt as per taste
Oil for frying
Wide sauce pan or tawa for frying the cutlets
1/4 C rava (semolina) for coating the cutlets
- Boil all the vegetables in pressure cooker by adding little water and salt. Cook till 2 whistles.
- Cool the boiled veggies and mash them together.
- Add all the ingredients as listed till salt. Make Patti shaped or finger shaped and keep it aside.
- Meanwhile take a wide frying pan/skillet and heat oil so that it covers the entire surface of the pan, if you are using nonstick skillet use less oil.
- Now take rava(semolina) in a plate and coat the prepared Patti's and transfer it to skillet for frying. Shallow fry(tawa fry) on medium heat.
- It takes about 3-4 mins each side and place it on paper towel to soak the excess oil if any.
- Serve hot with ketchup/hot sauce or just snack it.
Thursday, July 21, 2011
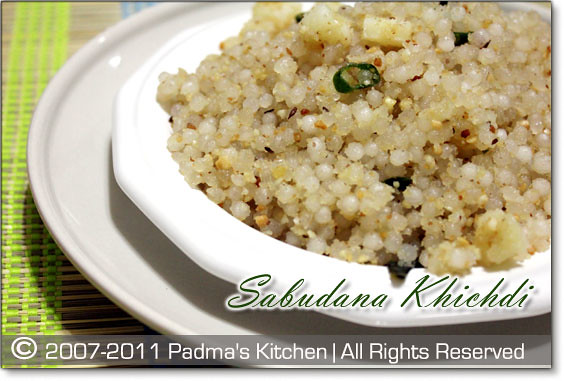
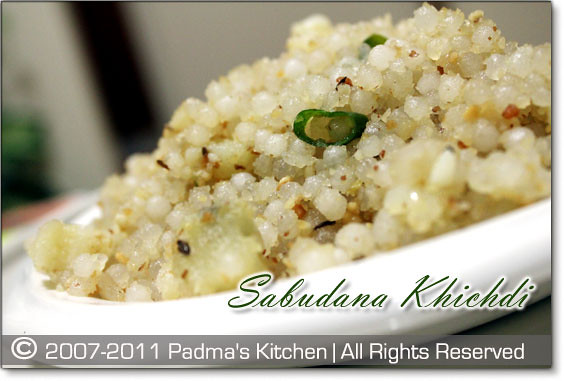
Maharashtrain style Sabudana Khichdi
You must be wondering how come western India recipes on my blog...well I am raised in Kalyan and much acquainted to Maharashtrian food. Since my childhood I used to trade my lunch box whenever my friend used to bring this in her lunch box. Sabudana khichdi is my favorite breakfast recipe, I love so much that I can eat 4 times a day! This is a typical Maharashtrian style khichdi I learned from our kaki (maid), she makes awesome khichdi!!
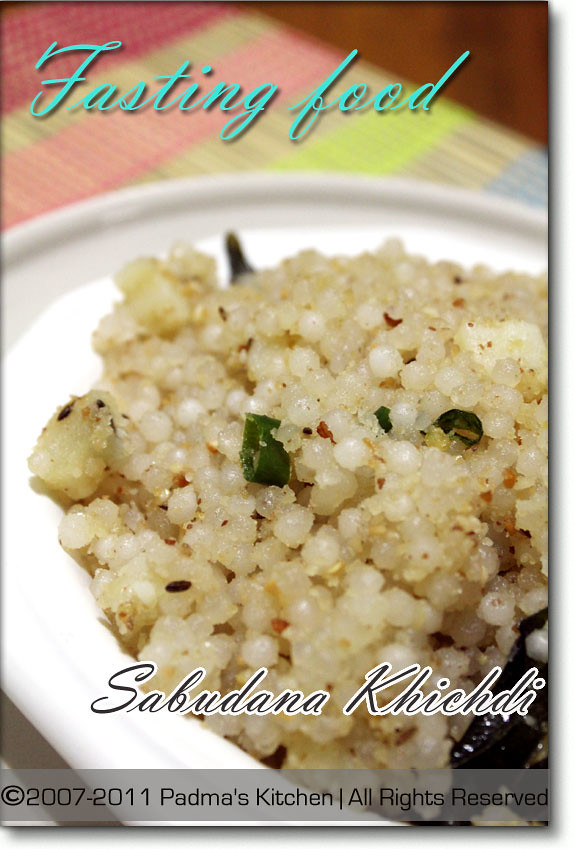
Sabudana Khichdi is also famously called a fasting food during the ekadashi days, or sankashti chaturthi days when most of the maharashtrians fast. You will find in on the menu of many mess/canteens in most of Mumbai and surrounding when there is this special fasting done. But I love it any time any day. I make it as Naivedyam or Prasad to offer to Saibaba on Thursdays or for Saibaba Satsangs. After much talking here goes the recipe.
Sabudana Khichidi (Maharashtrian style)
Cuisine: Maharashtrian Cuisine
Prep time:20 mins and 6-7 hours soaking sago
Cooking time: 20 mins
Serves: 4
Ingredients:
3 green chillies
1 C roasted peanuts (remove the skins and grind into powder)
2 tsp crushed jeera
6-7 curry leaves
1 medium potato, medium diced
¼- ½ C oil
Kadai or non-stick pan
Method:
- Soak sabudana 6-7 hours before hand. First wash and rinse the sabudana and then soak them in enough water that all of it is submerged in the water.
- Next, roast peanuts in microwave. Place them on microwave safe plate and heat it on high for 3 or 4 mins. You will see that the peanuts are turned slightly brown, let it cool and remove the skin and grind into powder. alternatively you can dry roast them in a pan, if m/w is not the option.
- Chop potato into medium size and medium size and place then in a microwave safe bowl, pour some water and heat it for 5 mins high. alternatively you can fry the potatoes in the oil itself, will take little while till they turn crispy.
- Heat oil in kadai or non-stick pan on medium high, add curry leaves/kadipatta, crushed jeera and green chillies, let them fry for 1 min and then add the boiled aloo. Reduce the flame to medium low and let the potatoes turn crispy golden brown.
- Add the sabudana, mix well, for a minute so that everything is mixed well. Sprinkle salt, close with a lid and let it cook for 10 mins... keep in mind to reduce the flame to simmer (low), after 8-10 mins check the khichdi and see if there are any hard white sabudana left, coz by now you sabudana will turn into transparent soft pearls. Check for salt and lastly add peanut powder, mix well and let it cook for another minute. Close the lid and remove from stove.
Few tips for a pearly sabudana khichdi:
- See that you raw sabudana is not crushed or has lot of powdered sago in it.. If that is the case then just sift the sago so that all the powder is out and on whole sago is to be used.
- Soak them at least 6-7 hours before hand. If you want to make it for breakfast, you can soak overnight, if want to make it as an evening snack, soak in the morning by 11:am
- Soak it in enough water to cover the sabudana, do not add more water, or else you will end up with a mushy khichdi. So the rule of thumb is just enough water so that all the sago is submerged in it.
- Use a little bit extra oil to get that tasty khichdi...common once in a while its ok to have an extra tablespoon or so... so why compromise on the flavor.
- You can use more peanut powder than listed in the above menu...more taste you see!!
Thursday, April 7, 2011
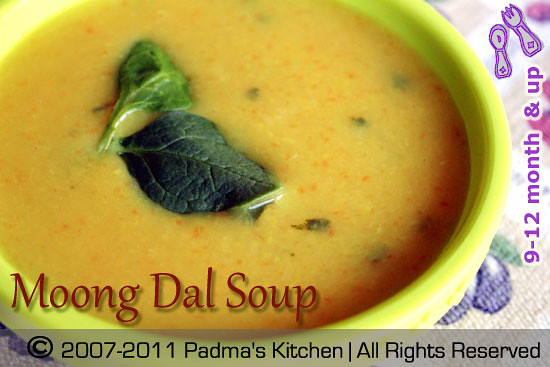
Moong Dal Soup
I started gathering recipes from friends, experienced moms, my mother, older sisters in the family, books on baby food for over a year now, reinventing and recreating the old recipes with a new twist was like experimenting flavors in your lab (kitchen). So I thought why not introduce my new line of recipes especially for babies,toddlers and kids on Padma's Kitchen. You can find many interesting baby food recipes going forward, that's my promise to all the new parents, Good Luck and Happy Parenting!!
Moong Dal Soup with Carrot and Spinach is a hearty soup which is rich in protein from lentils, Vit A, iron from spinach and Vit A , beta carotene from carrot. You can feed this soup to babies from 9 months and up. As the age of the baby goes up you can make this soup even chunkier and add more veggies to it. If your baby is older than 18 months you can mix it with some cooked rice and feed. It is a very common recipe in India and moong dal helps with digestion and produces less heat to the body compared to any lentils.
Source: My Mother
Cuisine: Indian
Prep & Cooking time: 20 mins
Servings: 3
Ingredients:
½ C split yellow moong dal (lentil)
½ C shredded organic carrot
handful of spinach, roughly chopped
a pinch of turmeric powder/haldi
a pinch of crushed black pepper
1½ C baby water
salt to taste
2 tsp of ghee (clarified butter)
Method:
- Rinse the split yellow moong dal and soak it in one and half cup of water.
- Meanwhile shred or grate the carrot and clean, also rinse and chop the spinach.
- If you have a pressure cooker, combine all the ingredients except salt and ghee. Pressure cook till 4 whistles, takes around 15 mins.
- If you do not have a pressure cooker, cook it in a medium sauce pot with double the water over medium heat for 30-40 mins or till the lentils are tender.
- When its done add some salt and ghee and feed your baby when the soup is still lukewarm.
- Consistency of the soup should be easy flow like tomato soup. As the age of your baby goes up you can thicken it by adding less water and also some spice too, like garlic or ginger!
- You can store the leftover in refrigerator and feed it in 2-3 days, but heat in microwave or stove top every time you feed your baby. You may notice that the dal solidifies once you cool it so you may add some water to loosen up but at the same time add some salt.
- You can also feed this soup with cooked rice to babies older than 1 or 1½ year and who are eating chunkier foods by now.
Wednesday, February 2, 2011
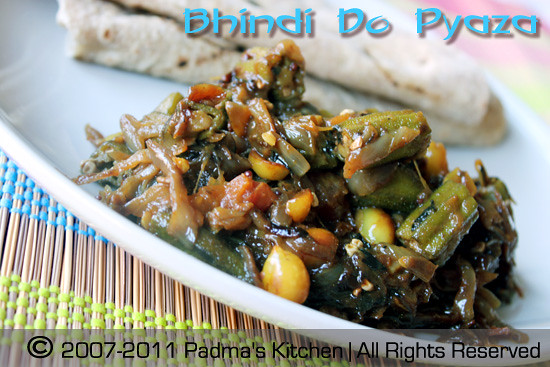
Bhindi Do pyaza
Another name for "Bhindi" is Okra... and "Do pyaza" denotes presence of double the quantity of onions than that found in any other style of preparation. I love this side dish with rotis and rice, actually goes well with both. When I have fresh Bhindi handy then definitely make this one to go with phulkas. But my version is little unusual, as I am not adding yoghurt(curd) into this recipe, instead I added roasted peanuts, and the verdict!
This is a simple stir fry of Okra and onions with some spices. First and foremost you will need a non stick pan or kadai for cooking this dish and here goes the recipe.
Source: My own
Cuisine: North Indian
Prep time:15 mins
Cooking time: 30-40 mins
Serves: 4 people
Ingredients:
1 pound (½ kg) fresh Bhindi/okra, cut into 1-inch pieces
2 large red onions (almost 2 cups) sliced
1 medium tomato, chopped (yields ½ C)
1 clove of garlic, crusher
1 t chilli powder/paprika
½ t turmeric (haldi)
½ t crushed jeera
handful of roasted peanuts
roughly chopped cilantro
2 T cooking oil
1 t mustard seeds(rai)
1 t cumin
4-5 fresh curry leaves (kadipata)
Salt as per taste
Method:
- First and foremost clean the Bhindi with water, place it on a kitchen towel to drain the excess water and wipe it dry with paper towel.
- Cut the bhindis into one-inch pieces.
- Heat ½ teaspoon of oil in a non stick frying pan or kadai and fry bhindis till they are half cooked, about 15 mins. In the end add some salt , turmeric and saute for another minute. Remove from the pan.
- To the same pan add the remaining oil. Heat and add mustard seeds, cumin. When the mustard splatters, add curry leaves and fry it for 10 secs or so.
- Then add the sliced onions and little bit of salt to sweat them. Fry onions till they are pink and translucent in color. Now its time to add crushed garlic and tomatoes. Fry till the tomatoes are cooked, for about 8 minutes on medium flame
- Then add fried bhindis, chilli powder, crushed cumin. Let all the ingredients mix well and cook in those flavors for about 10-15 mins.
- Lastly add roasted peanuts and chopped cilantro/kothmir leaves. Saute for another 2 mins, check salt and take off the heat.
- Serve hot with rice and dal or rotis and phulkas.
Wednesday, January 26, 2011
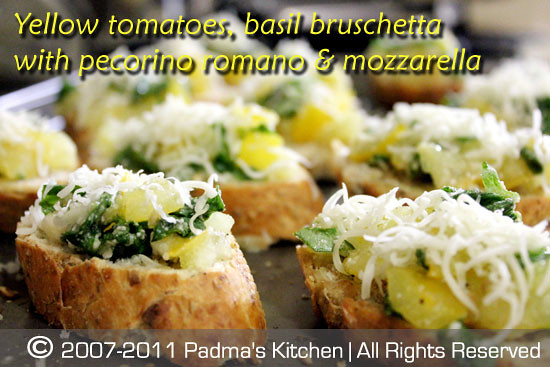
Yellow Tomatoes, Basil Bruschetta
Padma's Kitchen is back to where it belonged, Foodie world of blogging. And there is another reason too, Padma's Kitchen is wearing a new look this season, come check it out!
I know this announcement seems like as if I am shouting that we are back to business baby! No it isn't like that but being away from blogging for so long time seemed like forever, like an iron fence rusting in the rain, I need a shout out.
Why it took so long time? I became lazy, I needed a little boost of self esteem, little bit of encouragement, my source of inspiration still remains the same (DH). Remember since long time I was cribbing about redesigning my blog, got fed up with the same old look, and all that. DH helped me in restructuring and designing this new look, "A Makeover". So what are you doing, common and check it out... I am all excited and anxious to read all your valuable comments, critics, what you think and your wishes for my blog. There are still some tit-bits to be taken care off, but the site is up and functional.
I didn't want to make this as a separate post so made this announcement here. I am back with a new recipe of Bruschetta this time using Yellow tomatoes, basil and two cheeses Mozzarella and Pecorino romano. I am sure you will love it. DH came across some yellow tomatoes in the farmer's market. So thought of making something special for this occasion. I know what you are thinking yellow tomatoes in winter, yes during the winter time too! There is a fabulous farmer's market near his workplace with so many varieties and fresh produce. Quiet often he does some shopping for me.
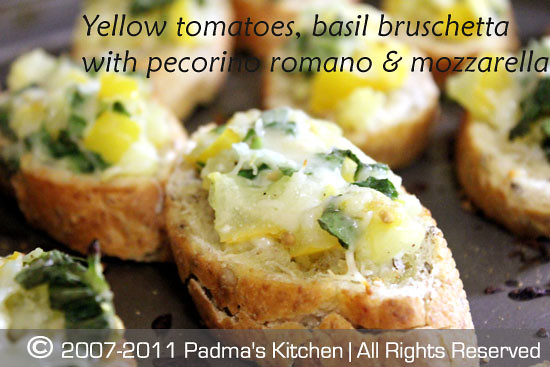
Source: adapted from Giada De Laurentiis
Cuisine: Italian
Prep time:10 mins
Baking time: 15-20 mins
Serves: 5-6 people
Ingredients:
1 large French baguette or any Italian bread, sliced 1-inch thick
4-5 sprigs of fresh basil leaves, coarsely chopped
5 Yellow tomatoes, who can use anything handy but tomatoes, medium chopped
1/2 C shredded mozzarella cheese
1/4C grated pecorino romano cheese
2-3T of extra-virgin olive oil
2 cloves of garlic, peeled
freshly ground black pepper
Salt as per taste
Method:
- First turn on the broiler, meanwhile slice the baguette and line them up on a cookie sheet. Drizzle with some extra-virgin olive oil (be liberal coz its healthy).
- Broil the bread for a min on the upper shelf till it turns light brown, be careful not to burn the bread, remove and set the oven to 350°F [176°C].
- Now rub garlic clove on the bread to get the aroma and flavor of garlic.
- In a bowl or on the chopping board(like I did) mix the basil leaves, chopped tomatoes and grated pecorino romano cheese, salt and pepper.
- Spread one tablespoon of the tomato mixture on each piece and top it with shredded mozzarella. I use cheese sparingly but cheese lovers you can go ahead and add as much cheese as you want. or you can replace the shredded ones with thick slice of fresh mozzarella.
- Place bread back in oven and bake it for 15-20 mins, or till the cheeses melt and your kitchen is filled with the aroma of basil.
- Place bruschetta on decorative platter and serve hot.
Thursday, June 17, 2010
Hearty Lettuce, Carrot, Cherry tomatoes Salad with homemade dressing
June's 1st weekend we drove to Albany, NY to attend a birthday party of our closest friend's daughter. For the party I made this salad which everyone appreciated and enjoyed eating as much as I loved making it all the while hoping it to turn out well. You won't imagine people loved it and few of them took a second serving too! I was so overwhelmed with the kind of response and appreciation I got for the salad, thought of sharing it with all my readers too. Also many asked for the recipe there, I have a similar salad recipe but the dressing is a little bit different so thought of posting it on my website.
Salads are a healthy way to eat good and nutritious food. And for a basic salad recipe what I do is just peep into my refrigerator and pantry for necessary ingredients like salad greens, dried fruits, any kind of nuts and lastly some acidic ingredient like vinegar or citrus juice, that's pretty much it. I start making delicious salads by combining friendly veggies that go well with each other and the flavors kind of marry with each other quiet well. I try many dressings doing my own version, sometimes, I like it, sometimes they take a ride into my kitchen sink. Coming to this dressing, it is simple homemade vinaigrette with vinegar, extra virgin olive oil, honey and Dijon mustard with little seasoning.
Source: My own
Cuisine: American
Prep time: 10 mins
Serves: 4
Ingredients:
6 leaves of Romaine Lettuce, torn
6 cherry tomatoes, halved or quartered
1 carrot, grated
½ red onion, chopped
1 seedless cucumber (optional)
1 pack seasoned bread croutons (optional)
Handful of toasted almonds/pinenuts/walnut(any)
dried cranberries for garnish
for dressing:
1 T distilled vinegar or lime juice
1 t dijon mustard
1 T honey
2 T extra-virgin olive oil
pinch of salt/ as per taste
1 tsp ground black pepper
Method:
1. Mix all the salad ingredients except nuts and croutons in a large bowl.
2. Prepare the dressing by first adding dijon mustard in vinegar juice whisk well.
3. Add freshly ground black pepper, salt, honey mix well.
4. Whisk vigorously while adding extra-virgin olive oil.
5. Spread over the salad, mix and cover it with plastic wrap and keep refrigerated.
6. When ready to eat top it with toasted almonds and croutons.
Tip: For crunchy salad, wash the greens and use a salad spinner to remove excess water out of the leaves or you can dab excess water in the leaves with a kitchen towel.
Click on Salads from my kitchen
Monday, November 23, 2009
Roasted Butternut squash with Rosemary and Balsamic Vinegar

Storage: Butternut squash can be stored longer than summer squashes because their skin is so hard and thick. Store in a cool dry place for at least a month. If the squash has been cut into pieces, then wrap in a plastic wrap and refrigerate up to 5 days.
Nutritional Qualities: The following qualities are available in one cup of mashed squash: 80 calories, 2 grams protein, 1 gram fat, 18 grams carbohydrates, with riboflavin, iron, Vitamins A and C.
Source: Seeds of Knowledge

Roasted Butternut Squash with Rosemary and Balsamic Vinegar
Recipe Source: Kalyn's Kitchen
Cuisine: American Cuisine (South Beach Diet)
Preparation time: 15 minutes
Cooking time: 35-40 minutes
Ingredients:
1 medium sized butternut squash, about 6 cups of peeled, de-seeded and cut into cubes
2 tbsp extra virgin olive oil
1 tbsp + 1 tsp balsamic vinegar
1 tsp rosemary, finely chopped
kosher salt as per taste
freshly ground black pepper
Method:
- Preheat oven to 400°F [200°C]. Cut the butternut squash into half and peel it with a knife (do not use peeler, it tough to work with). Cut into bite size pieces or you can use ready made store brought.
- Toss with extra virgin olive oil, kosher salt, rosemary, balsamic vinegar and freshly ground black pepper. Spread them single layered either on a cookie sheet or large dish.
- Roast until squash turns soft and lightly caramelized about 40 minutes in the oven.
- Remove from oven, toss it with 1 teaspoon of balsamic vinegar, freshly ground black pepper and kosher salt. Serve hot.
- Kalyn says "This is also excellent made ahead and reheated. For a holiday like Thanksgiving where there are lots of demands on the oven, it could be cooked early in the day and kept warm in a crockpot while other things bake"
Happy Thanksgiving to everyone!!
Monday, November 17, 2008
American Butter Corn
Any one who recently visited India will know about this famous theater snack which is so popular amongst all the ages. Yes, I am talking about American Butter Corn. is famous in most of the movie theaters all across India especially in Andhra Pradesh. Some how I managed to bring that taste here, I make this for prasadam/offering to Saibaba. This recipe has less fat from one tbsp butter, It is a good source of fiber as we make from fresh corn and here goes the simple recipe.
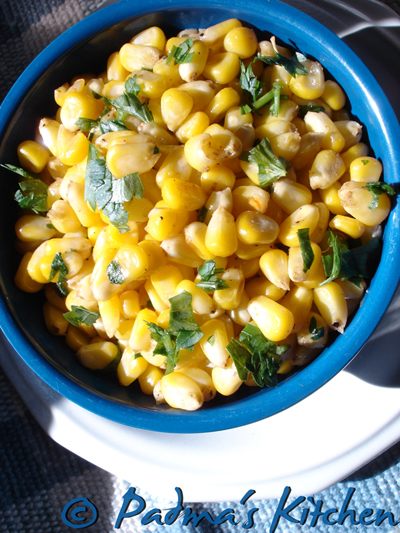
American Butter Corn
Recipe Source: My Own
Cuisine: Global
Preparation time: 10 minutes
Cooking time: 10 minutes
Makes: 4-5 people
Ingredients:
3-4 fresh sweet corn
2 tbsp fresh parsley, chopped
freshly ground black pepper
1 tsp red chilli powder
1 tbsp butter
salt as per your taste
4 cups of water
Method:
- Bring 4 cups of water to boil, to this add salt. Break fresh corn into two or three pieces and boil the cobs for 10 mins.
- Peel corn from the cob.
- Take a saute pan, heat it on medium high, add butter to that. Now add corn, freshly ground black pepper, pinch of salt and chilli powder.
- Mix well so that excess water is evaporated, at the end mix in some chopped parsley or cilantro. You can play with the flavours here by adding different kinds of herbs and spices.
Sunday, September 7, 2008
Lunch Box Pasta ~ Penne in creamy tomato sauce

But I admit that I don't like much cheese in my food. So I adjust accordingly and make paste with penne being one of my favorite shape amongst all. This is one yummy recipe that I tend to make again and again, week after week and never lets me down. I make this weekly once for JB and he loves to take in his Lunch box, thence the name!

Penne in Creamy Tomato Sauce
Recipe Source: My Own
Cuisine: Fusion Food, Italian Cuisine
Preparation time: 20 minutes
Cooking time: 15 minutes
Ingredients:
2 cups pasta, uncooked
1 cup pasta sauce, store brought(I use Tuttoroso or Ragu brand)
1 shallot(onion), diced thinly
3-4 cloves of garlic, minced
2 tbsp roasted red pepper homemade or store bought
2 tbsp parsley, freshly chopped
¼ cup light cream or half-n-half
½ tsp red chilli powder/karam (optional)
¼ cup freshly grated parmesan cheese
a bunch of fresh basil, chopped
2 tbsp extra-virgin olive oil
freshly ground black pepper
salt as per taste
8 cups water
Method:
- Cook pasta as per the instructions on the packet.
- Take a large sauce pan, heat oil and sauté shallots and garlic. Add salt to sweat the shallots and season it with freshly ground black pepper.
- Now add pasta sauce, chilli powder, salt and let it cook for a minute. Then add freshly chopped parsley, chopped roasted peppers and cream or half-n-half to it. Let it cook for a couple of minutes.
- Taste for salt and pepper, add the cooked pasta, mix well. Add chopped basil and top it with freshly grated parmesan cheese.
Penne with Parsley Pesto and Zucchini
Orzo with lemon, feta, cranberries and methi sprouts (Pasta salad)
Spaghetti with roasted pepper medley
Friday, September 5, 2008
Brussels Sprouts Stir fry

Admit it, when was the last time you ate Brussels sprouts? I was indulged in these beautiful cabbage buds (to me!) one year back when I saw at some one's blog and thought of giving it a try. Though I was skeptical initially, but started to cook with Brussels sprouts quiet often and now it has become one of our family favorites. JB loves having Brussels sprouts with chapatis, rotis or rice and dal.
Brussels sprouts can be cooked in many ways. Some like to eat it raw, some boil it, some roast it, some stir fry it while some bake it. There are many yummy recipes available in the food blogosphere! But only one basic formula: Treat this veggie as you do with cabbage and it will justify its presence in the dish you make with it.
Many people like to have it when the Brussels sprouts are well cooked. Check this article on San Francisco Chronicle I bet you will go back to this veggie again and again! I am making Brussels sprouts stir fry with the spice mix I blogged last week. Now sit back and enjoy the show....oops recipe!

Brussels Sprouts Stir fry with peanut garlic spice mix
Recipe Source: My Own
Cuisine: Fusion Food
Preparation time: 10 minutes
Cooking time: 20-25 minutes
Ingredients:
12-15 Brussels sprouts
1 shallot(onion), diced thinly
2 tbsp roasted red pepper homemade or store bought
2 tbsp peanut garlic spice mix
salt as per taste
½ tsp red chilli powder/karam (optional)
for seasoning/temepering/tadka/poppu:
1 tsp cumin/jeera/jeelakara
1 tsp mustard seeds/rai/avaallu
2-3 dried red chillies, roughly torn into two pieces
3-4 curry leaves
2 tbsp olive oil
Method:
- Clean the brussels sprouts, remove any loose leaves and chop them into bite size.
- Heat oil in a large sauté pan, add all the ingredients under tempering list and fry for a minute. Turn heat to medium high, add diced shallots, hit some salt and this will sweat the shallots. Add roughly chopped roasted red pepper and diced brussels sprouts.
- Sauté on high for about 10 minutes, if required sprinkle some water and cook it till done.
- Lastly add the peanut garlic spice mix and cook for another two minute until it is mixed well.
- Serve with rotis or rice.
Monday, August 18, 2008
Perugu Potlakaya ~ Snake gourd in home made yogurt

Perugu means Yogurt., Potlakaya means Snake gourd, together Perugu Potlakaya. Snake gourd is called as Potlakaya in Telugu, podalankai in Tamil, Padavalanga in Malayalam, Padavalakai in Kannada and Chachinda in Hindi.
This is a healthy vegan recipe, quick to make and needs nothing much than few Indian seasoning items like mustard seeds, cumin seeds, blackgram dal and few curry leaves. I make this curry when the snake gourds are in season. We can also make using 'frozen Potlakaya'. I like to have this with Sambar or pappu charu along with company of hot steamed rice. This is very commonly prepared in South India, some add grated coconut and other sauté it simply.
Source: My Mother
Cuisine: South Indian, Andhra Cuisine
Prep time: 10 mins
Cooking time: 25 mins
Serves: 4
Ingredients:
2-3 C snake gourd/potlakaya, de-seeded and chopped into small pieces
2-3 green chillies, finely chopped
½ t turmeric powder/haldi/pasupu
salt as per taste
for tempering/tadka/poppu:
1 T cooking oil
1 t mustard/rai/avaalu
1 t cumin/jeera/jeelakara
1 t blackgram dal/urad dal/minapappu
4-5 fresh curry leaves/kadipata/karvepaku
pinch of asafeotida/hing/inguva
Method:
- Clean snake gourd/potlakaya by scrubbing thoroughly some salt on its skin. Rinse in water. Cut into half and remove its seeds. Chop snake gourd/potlakaya into small pieces. Finely chop green chillies also.
- Heat oil in a kadai/medium pot. Add first three ingredients under tempering. Fry for a minute or till the blackgram dal turns reddish brown. Add curry leave and asafeotida/inguva and fry for a minute., then add finely chopped green chillies.
- When the chillies are cooked add chopped potlakaya/snake gourd and sauté till all flavours are mixed together.
- Add turmeric/haldi/pasupu and mix and let it cook by covering a lid on medium heat for 20 mins approx.
- When all pieces are cooked and curry becomes dry as water gets evaporated.
- Lightly whip some home-made yogurt, once the curry is cooled down or reaches room temperature, mix in yogurt and your Perugu Potlakaya is ready.
Try it out and let me know how it tasted...
Thursday, August 14, 2008
Tri-colour Salad

I wish all my desi readers a very Happy Independence day!
"At the stroke of the midnight hour, when the world sleeps,
- Jawaharlal Nehru (on Indian Independence Day, 1947)
I have many cherished moments as a kid when we used to assemble in our school grounds and sing "Jana Gana Mana...." our National Anthem. We used to get lot of chocolates and sweets on this day at school. I remember my father brings home these small flags we can tuck on our uniforms. Coming home after the flag hoisting me, my brother and sister used to count the number of chocolates we received from our class teacher/leader. Though who had some influence , chipped in most. Ohh so wonderful time spent with my brother and sister and my classmates!
Happy Independence Day to one and all!
 On this occasion I would like to tribute My Country, My Matrubhoomi (Motherland) this Tri-colour salad. The recipe is quite simple and I worked with colours primarily focusing on Saffron (
Source: My Own
Cuisine: Global
Prep time: 5 mins
Serves: 2-4
Ingredients:
½ C fresh spinach, chopped
1 Carrot, peeled and grated
¼ c Feta cheese/goat cheese or Paneer
for vinaigrette dressing:
1 T fresh lemon juice
Salt as per taste
Freshly ground black pepper
1 T extra virgin olive oil
for garnishing:
Handful of toasted pine nuts (optional)
Method:
- Combine chopped spinach, grated carrot and feta cheese or if you are using paneer, then chop into small cubes. Toss them in a large salad bowl.
- In a separate small bowl whisk lemon juice with extra virgin olive oil, add salt and freshly ground black pepper.
- Pour freshly prepared vinaigrette into the salad and toss well.
- Before serving garnish with toasted pine nuts or any nuts of your choice.
Vande Mataram --
Tuesday, August 12, 2008
Paneer Bhurji

Paneer is often referred to as Indian Cottage cheese and there are numerous way to cook them. Paneer is a type of cheese. It is the Indian name for cottage cheese. Paneer, unlike other cheeses, Paneer has not been matured and it is rather bland. It is a high protein food; it is often substituted for meat in many vegetarian entrees of Indian cuisine. It is commonly used in curried dishes. Paneer is quite easy to make at home.
How to make paneer at home
Bring 1 Gallon/3.5 liters of fresh whole milk to the boil. Add 2 table spoons of vinegar or lemon juice or curd and stir well. Put aside. After the milk has curdled, wrap it in a clean muslin cloth, rinse with fresh water and drain well. Form a ball and place it under a heavy saucepan for approx. 20 minutes 12 oz/350g approx of paneer is ready to use. While making paneer from milk, don't throw away the paneer water. This nutritious water can be used for making soft dough for chapatis, rotis or can be used to cook dals.
It contains reasonably good amounts of fat and cholesterol. It would be better to avoid it for those with hypertension and diabetes due to its high fat content. It can however be used in small quantities for such patients one or twice a week. It is suitable for all age groups.We often use paneer to make curries, appetizers or a side dish to accompany with rice, rotis/Indian flat bread.
My recent encounter with this fabulously tasting Paneer Bhurji was at a local restaurant named "Sai Krupa" in Kalyan. After a whole day of exhaustive shopping we got to order from one of those eating joints. Since the taste is still ticking in my mind, I made an attempt to cook this at home and I can say it was not that bad! A pat on my back, please!

Here is my recipe to make Paneer Bhurji
Source: My Own
Cuisine: Indian
Prep time: 10 mins
Cooking time: 15 mins
Serves: 4-5
Ingredients:
½ pound of fresh paneer, grated
1 medium onion, chopped finely
2 medium tomatoes, chopped finely or
4 T of canned crushed tomatoes.
¼ C green peas, fresh or frozen
1-2 green chillies, finely chopped
¼ t garam masala powder
½ t cayenne pepper/chilli powder
1 t sugar (optional)
½ t carum seeds/ ajwain/vaamu
Pinch of hing/asafeotida
freshly grounded black pepper
½ t cumin/jeera
salt to taste
freshly chopped cilantro for garnish
Method:
- Chop onions, tomatoes and green chillies and keep aside.
- Take large sauté pan or kadai, heat oil, add cumin/jeera and fry for a minute. Add hing/asafeotida and carum seeds/ajwain seeds. Let the aroma of hing fill your kitchen.
- Add chopped onion and green chilles, add little salt and cook till the onions are translucent or 6-7 minutes approx.
- Add green peas, chopped tomatoes or if you have crushed tomatoes, your dish will be ready in minutes.
- Add freshly ground black pepper, garam masala and chilli powder. Stir and let the tomatoes cook till the tomatoes leave oil from its sides or for another 6 minutes approx. Add sugar and taste the gravy for salt, add if required.
- Meanwhile grate the paneer and add this to the onion-tomato mixture. Keep stirring continuously till all the flavours are blended together.
- Garnish with fresh cilantro and serve hot with rice or rotis/chapatti or any Indian Flat bread.
Variation: You can add ½ cup of whole milk or heavy cream to make some gravy. I personally like the dry one.
Thursday, July 31, 2008
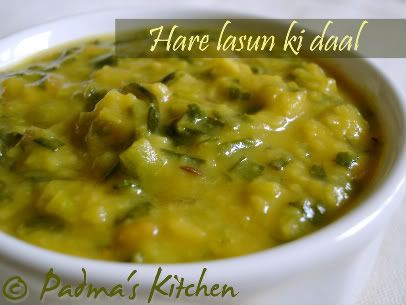
Hare lasun ki dal ~ Green Garlic Daal
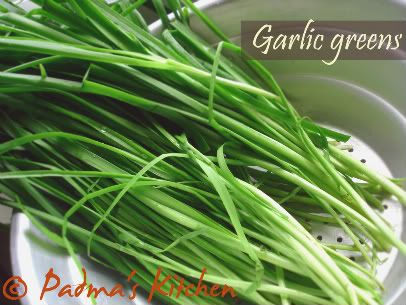
"How can we use them in cooking, where can I find recipes using these greens". I always talk to myself when I see them at my local farm marker. Yes, I am talking about green garlic.
Green Garlic is a spring culinary treat that does not receive as much fan fare as it deserves. This mild stage of garlic may be hard to find unless your have access to a farmers market that sells this delicacy (from March to July) or you garden and grow your own. If you are going to purchase green garlic look for green stalks that are not yellowing or blemished.
Prepare - Similar to leeks, green garlic stalks trap dirt and sand within the leaves. Rinse each stalk carefully. Once washed, the entire stalk can be used.
Store - If you are growing the garlic then harvest right before you use it. Green garlic can be stored in the refrigerator for up to three or four days. One stalk of green garlic is equivalent to one or two cloves of garlic.
I got hold of a bunch from my local farm market and used in the preparation of this dazzling dal. I used half the bunch of garlic greens for this recipe as the green garlic flavor is very overpowering.
Source : My own
Cuisine: South Indian Fusion
Prep time: 7 mins
Cooking time: 20 mins
Serves: 4 people
Ingredients:
1 C toor daal/ split-redgram lentil, uncooked
1 C or 10-12 sprigs of green garlic, chopped roughly
1 shallot, chopped
1 medium tomato, chopped finely
1/2 t turmeric powder/haldi/pasupu
1/2 t cayenne pepper/mirchi powder/red chillie powder
1 t cumin/jeera
1/2 t oil
salt as per taste
2 C water
for tempering/tadka/poppu:
1 tsp mustard seeds
1 tsp urad dal/black gram lentil
5-6 curry leaves
a pinch of hing/asafeotida
1 T any cooking oil
Method:
- Wash and soak dal for 30 minutes. Add one cup dal with half spoon of turmeric powder, cumin/jeera and half spoon of oil. with 2 cups of water, pressure cook for 4-5 whistles. Adding oil to dal will cook evenly and mash perfectly, cumin/jeera gives flavor to dal and turmeric gives the color.
- Once the dal is cooked cool down add salt to it and mash dal with a masher or traditional pappu gidda.
- If you do not have a pressure cooker, boil it in a large pot with two and half cups of water till the lentil is little overcooked.
- While dal is cooking chop garlic greens, shallots and tomatoes.
- In a kadai or small pot heat a tablespoon of cooking oil, add mustard seeds, let it splutter then add urad dal/black gram lentil, curry leaves and hing/asafeotida fry for a minute.
- Add chopped onions and let them fry for another minute or till they turn transparent. Once you know that onions are cooked add finely chopped tomato and cook till the tomatoes looks mushy mushy and starts to leave oil from its sides.
- Add cayenne pepper/red chilli powder and chopped green garlic. Cook for a minute or two.
- Pour the entire mashed dal, stir well and let it simmer for 2 more minutes and you are done. Check for salt
- Serve hot or cold with rice, rotis/phulkas/Indian flat bread.
More dals from my kitchen:
Baby Bok-Choy Pappu
Udipi Sambhar
Pedamma's Pappu charu
 Sending this to Weekend Herb Blogging Kelly from Sounding My Barbaric Gulp a herb blogging phenomenon started by Kalyn of Kalyn's Kitchen. The new rules are in effect to this event, please check her blog for more details.
Friday, August 17, 2007
Peddamma's Pappu Charu (kinda lentil/dal soup)

 Toor dal/red gram lentil
Cuisine: South Indian, Andhra
Prep time: 7 mins
Cooking time: 20 mins
Makes: 6 people
Ingredients:
1 ½ cup red gram lentil/dal/toor dal
1 small red onion, sliced thinly
1 big tomato, cut and squeezed
3 green chillies, cut length wise
1 small ball size tamarind, soaked in 1 cup water
1 tsp red chilli powder (cayenne pepper)
½ tsp turmeric powder/haldi
1 tbsp chopped cilantro
2 cups of water
salt as per taste
for tempering/tadka:
1 tsp urad dal/black gram dal
1 tsp cumin seeds/jeera
1 tsp mustard seeds/rai
2-3 torn dried red chillies
1 garlic clove, crushed and chopped
few curry leaves
a pinch of asafeotida/hing
1 tsp of oil
Method:
- Wash and soak the dal for about 20 mins or so. Boil it in a pressure cooker for 3-4 whistles.
- Meanwhile soak medium marble-size tamarind ball in 1 cup of hot water. Once the tamarind is soft, pulp it with hands and filter it. Keep the tamarind water aside and if there is more pulp in the remaining tamarind repeat the same with 1/2 cup water this time and continue so on till you have squeezed all the pulp out of the tamarind just like you do for sambhar preparation.
- In a deep sauce pan add the red onions, chillies and squeeze in the tomato pieces. To this add the tamarind water, cooked dal, red chilli powder, turmeric powder and salt, mix well and if required add water if the mix is too thick. Bring it to a boil or till the onions are cooked.
- Lastly temper it with seasoning by heating oil in a kadai/round bottom pan add the mustard, cumin seeds, urad dal/black gram dal then add the torn dried red chillies, curry leaves, and garlic. Once they are golden brown turn off the heat and add asafeotida/hing. Immediately pour this seasoning into the dal soup, Pappu charu is ready!
- Serve hot/cold with rice and curries or pachadi's as a side dish
Here is step by step photo explanation of the procedure, I know which would be confusing with out this.
 ingredients
 cooked dal mixed with tamarind water, onions, tomatoes, chillies, turmeric, salt and chilli powder


