These days everyone has become so health conscious, every other person I come across says that s/he are on a 'Diet' or have started eating healthy. Some are eating more of greens, whole grains, fruits and vegetables during the weekdays and go easy during the weekends. Eating a healthy, balanced diet is an important part of maintaining good health, and can help you feel your best. The key to healthy diet is to watch what you are eating, how many calories you need, how much water you are taking and how much is too much. The average man needs around 2500 cals/day and the average women needs around 2000 cals/day.
Eating a wide range of foods ensures that you are getting a balanced diet and that your body is getting all the nutrients it needs. Base your meals on starchy foods. Starchy foods should make up around one third of the foods you eat. Starchy foods include potatoes, cereals, pasta, rice and bread. Choose wholegrain varieties when you can: they contain more fiber, and can make you feel full for longer.
Eat lots of fruits and vegetables, Eat more fish, cut down on saturated fats and sugar. Increase your fiber intake, cut down on salt and fizzy drinks, keep well hydrated, taking 2-3 liters of water a day really helps flushing all the toxins from your system.
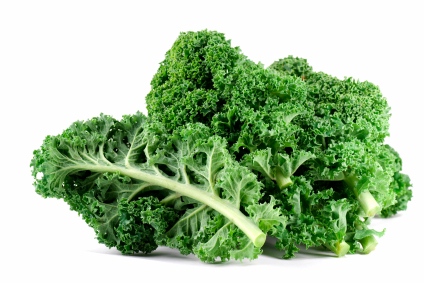
Coming to the main ingredient of this recipe, Kale is king!! Along with broccoli, it is one of the nutrition stand-outs among vegetables. It fights fat through its ability to mingle in a variety of roles -- in side dishes, combined in main dishes, or in salads. Kale is unusually high in fiber. This helps create the bulk you need to fill you up and to keep you full for a good amount of time. Kale is also an excellent source of nutrients, especially vitamin A and calcium. With a combination of vitamins, minerals, and phytonutrients, kale is a dieter's dream food.
Health Benefits of Kale
Though greens in general are nutritious foods, kale stands a head above the rest. Not only is it one of your best sources of beta-carotene, one of the antioxidants believed by many nutrition experts to be a major player in the battle against cancer, heart disease, and certain age-related chronic diseases, it also provides other important nutrients. In addition to beta-carotene, kale posses other important carotenoids: lutein and zeaxathin. These carotenoids help keep UV rays from damaging the eyes and causing cataracts. According to recent research results, kale is an incredible source of well-absorbed calcium, which is one of the many factors that may help prevent osteoporosis. It also provides decent amounts of vitamin C, folic acid, vitamin B6, manganese, and potassium.
The manganese in kale helps your body's own antioxidant defense system, superoxide dismutase, protecting you from damaging free radicals. Its folate and B6 team up to keep homocysteine levels down, which may help prevent heart disease, dementia, and osteoporosis bone fractures.
Image source & Information about Kale: web
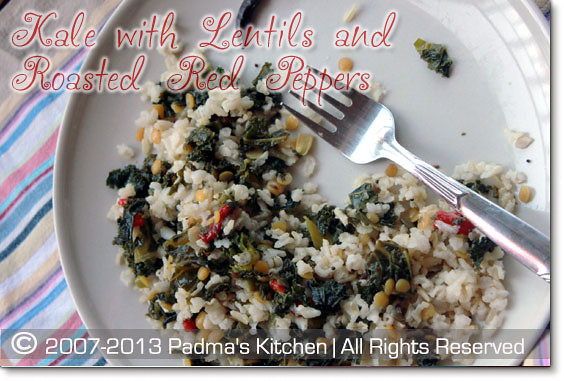
Coming to this recipe using Kale greens in your diet is somewhat tricky as this is very bland vegetable and after much of trail and errors, I found this is one perfect side dish that goes well with rice as well as rotis, Indian flat bread.
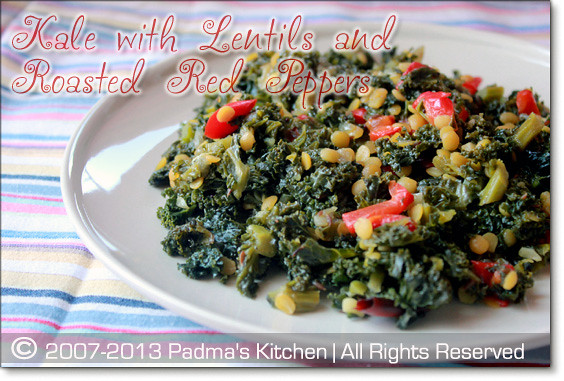
Kale with Yellow Lentils and Roasted Red Bell Peppers
Source: My Signature recipe
Prep time: 10 mins
Cooking time: 20-30 mins
Serves: 6 servings
Ingredients
5 C of Kale greens, roughly chopped
1/2 C of yellow lentils (toor dal/kandi pappu) soaked in water for 1hr
1/2 C Roasted Red Pepper, roughly chopped
check out how to make roasted red pepper at home
1/2 C red onions, diced
1T or 2 cloves of garlic, chopped
2 dried red chillies (optional)
1t cumin (jeera)
1t mustard seeds (rai/aavalu)
salt as per taste
1/2 t freshly ground black pepper
2 T extra virgin olive oil
1 C water
Method
- Firstly soak half cup of yellow lentils (toor dal/kandi pappu) in one cup of water.
- Wash your kale greens if it is not pre-washed. Chop them roughly on the cutting board make sure to chop those meaty stems.
- Meanwhile cook lentils along with water in microwave on high heat for 5 mins.
- Chop the onions and garlic and roasted red peppers.
- Take a big saute pan and heat extra virgin olive oil on medium flame.
- Add the cumin and mustard seeds to it, saute it for few mins till they are roasted.
- Add onions and garlic and torn red chillie pepper. Saute till they turn little red and then add kale greens. Stir for a min and let the color or kale gets intense.
- Add the lentils and the water to the pan and mix everything evenly. Add salt and pepper, cover and let the kale, lentils and all the flavors marry together. Cook till kale is cooked.
- Before turning of the stove off add the roughly chopped roasted red bell peppers, mix well check for salt and add if needed.
- Serve hot or cold with hot steamed rice, brown rice or rotis (Indian flatbread)