Twitter Delicious Facebook Digg Stumbleupon Favorites More

Tuesday, April 12, 2011

Sri Rama Navami Prasadam

VP_550
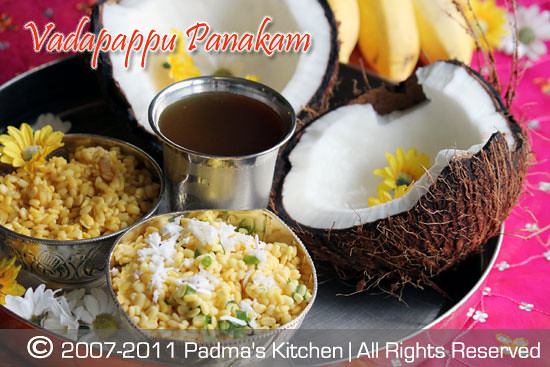
Two type of Vadapappu and Panakam for Sri Rama on occasion of Ramnavami


Padma's Kitchen wishes her readers, visitors, friends and family a very Happy Sri Rama Navami. May the Lord shower his blessings upon us.

Sri-Ramnavami , the celebration of birth of Sri Rama birth falls on the ninth day (navami) of the Chaitra masam(Hindu Lunar month). The festival commemorates the birth of Rama who is remembered for his preperous and righteous reign. Ramrajya (the reign of Rama) has become synonymous with a period of peace and prosperity. Mahatma Gandhi also used this term to describe how, according to him, India should be after independence.

At midday, when Lord Rama is supposed to have been born, a special prayer is performed. In northern India especially, an event that draws popular participation is the Ramnavami procession. In Southern India we make this special prasadam food to offer Sri Rama, the recipe follows.

"As promised here are the pictures of Naivedyam "


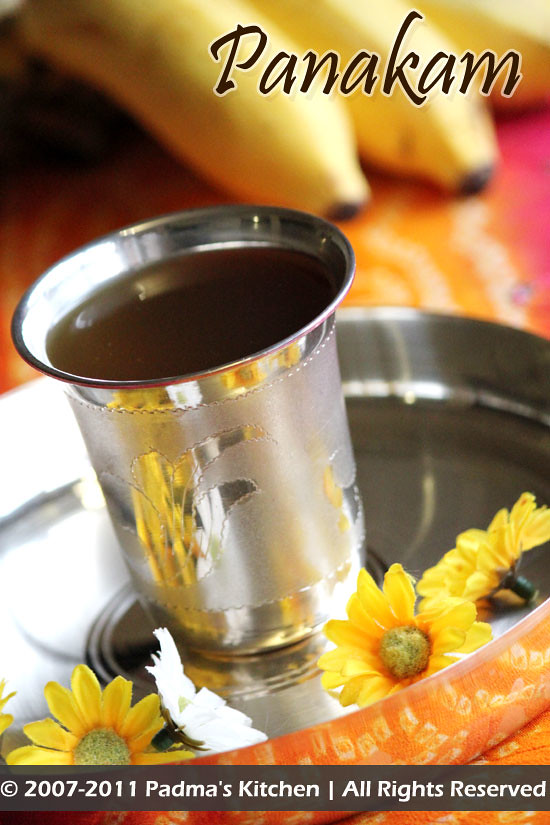
Panakam_550

Source: My Mother

Cuisine: South Indian, Andhra Cuisine
Prep time: 1.5 hours
Servings: 4

Panakam

Ingredients:
2 C Water
½ C grated jaggery/belam/gud
1 t crushed black pepper
½ t cardamom powder/elaichi powder
Method:
  • Dissolve the grated jaggery(bellam) in water and add the rest of the ingredients.
  • Take care while preparing the prasadam by not tasting it before offering it to God.
  • After puja is completed have panakam with vadapappu.


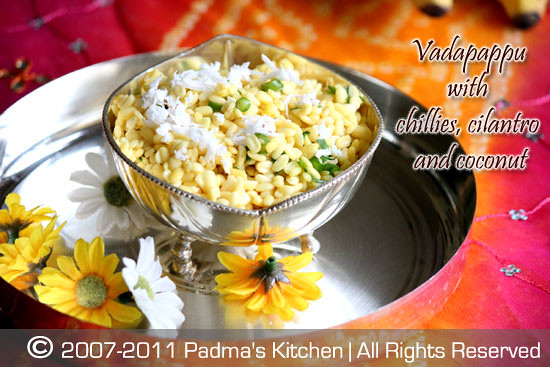
Vadappapu1_550
Savory Vadapappu

Ingredients:
1 C Moong dal (split yellow moong lentils)
1 small green chilli, finely chopped
2 T grated coconut
1 T chopped cilantro/kothmir leaves
a pinch of salt
Method:
  • Soak Moong dal for 90 mins to 2 hours in 2 cups of water. Rinse thoroughly 2 to 3 times and drain the soaked dal.
  • To this add the rest of the ingredients and offer to God first and then have the prasadam.

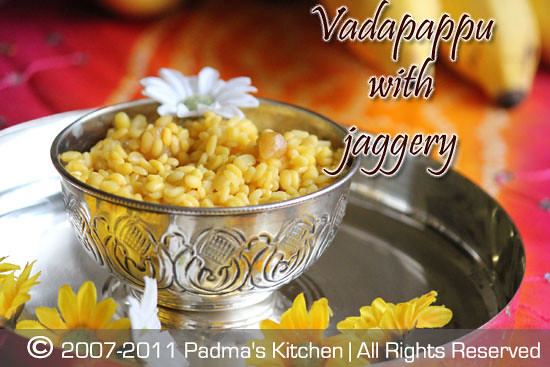
Vadappapu2_550
Sweet Vadapappu

Ingredients:
1 C Moong dal/ yellow split moong lentil
½ C grated jaggery/belam/gud
Method:
  • Soak Moong dal for 90 mins to 2 hours in 2 cups of water. Rinse thoroughly 2 to 3 times and drain the soaked dal.
  • To this add grated jaggery/ bellam, mix well and offer to God first and then have the prasadam.
Thursday, April 7, 2011

Moong Dal Soup

Ever since my little one 'Anshika' started eating solids I was in search of tasty, delectable and appealing baby food to make eating more interesting for her. Some days she eats and some days she doesn't and moreover making your baby eat is always time taking process but sometimes very challenging and frustrating too. Cooking homemade baby food became very interesting when Anshika started liking new foods.

I started gathering recipes from friends, experienced moms, my mother, older sisters in the family, books on baby food for over a year now, reinventing and recreating the old recipes with a new twist was like experimenting flavors in your lab (kitchen). So I thought why not introduce my new line of recipes especially for babies,toddlers and kids on Padma's Kitchen. You can find many interesting baby food recipes going forward, that's my promise to all the new parents, Good Luck and Happy Parenting!!


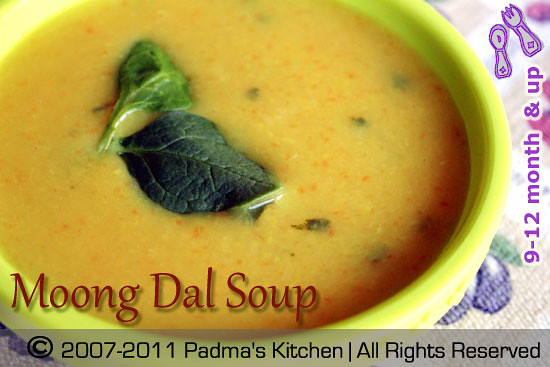
MDSoup_550
Baby Food - Moong dal soup with Carrot and Spinach

Moong Dal Soup with Carrot and Spinach is a hearty soup which is rich in protein from lentils, Vit A, iron from spinach and Vit A , beta carotene from carrot. You can feed this soup to babies from 9 months and up. As the age of the baby goes up you can make this soup even chunkier and add more veggies to it. If your baby is older than 18 months you can mix it with some cooked rice and feed. It is a very common recipe in India and moong dal helps with digestion and produces less heat to the body compared to any lentils.

Source: My Mother
Cuisine: Indian
Prep & Cooking time: 20 mins
Servings: 3

Ingredients:
½ C split yellow moong dal (lentil)
½ C shredded organic carrot
handful of spinach, roughly chopped
a pinch of turmeric powder/haldi
a pinch of crushed black pepper
1½ C baby water
salt to taste
2 tsp of ghee (clarified butter)

Method:
  • Rinse the split yellow moong dal and soak it in one and half cup of water.
  • Meanwhile shred or grate the carrot and clean, also rinse and chop the spinach.
  • If you have a pressure cooker, combine all the ingredients except salt and ghee. Pressure cook till 4 whistles, takes around 15 mins.
  • If you do not have a pressure cooker, cook it in a medium sauce pot with double the water over medium heat for 30-40 mins or till the lentils are tender.
  • When its done add some salt and ghee and feed your baby when the soup is still lukewarm.
  • Consistency of the soup should be easy flow like tomato soup. As the age of your baby goes up you can thicken it by adding less water and also some spice too, like garlic or ginger!
  • You can store the leftover in refrigerator and feed it in 2-3 days, but heat in microwave or stove top every time you feed your baby. You may notice that the dal solidifies once you cool it so you may add some water to loosen up but at the same time add some salt.
  • You can also feed this soup with cooked rice to babies older than 1 or 1½ year and who are eating chunkier foods by now.
These homemade baby food recipes are simple and rewarding to make - become head chef for a very special little customer!

Tuesday, March 29, 2011

Egg Dum Biryani

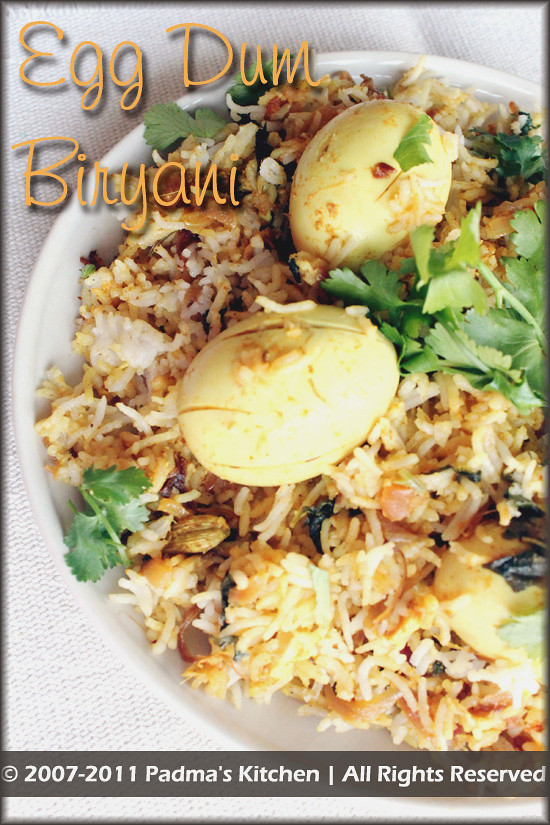
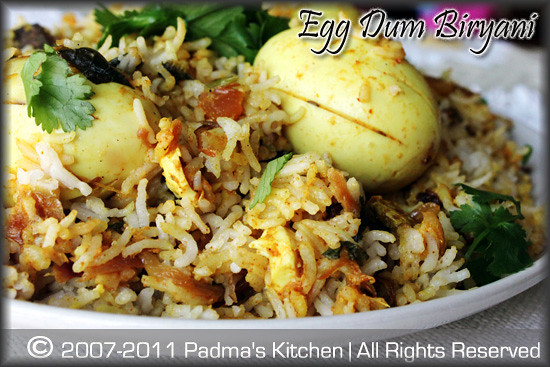
When it comes to comfort food, anything which involves cooking with egg is my comfort food. Egg Dum Biryani is one of the easy recipe when we are out of chicken in our freezer and easy to cook on late sunday afternoons. This recipe was sitting in my post without publishing for a long time now, I needed a little push and some time out of facebook. I have been procrastinating for some reason or other, so better late than never as this recipe deserves a standing ovation..

DH says this is one of his favorite dum biryani and so it is!! And moreover it doesn't need any gravy to accompany as the eggs in it replaces the meat/chicken/veggie needs. We fall in love with this biryani every time I make it!!


EDBiryani_2_550


EDBiryani_3_550


Source: My Own
Cuisine: Indian, Hyderabadi
Prep & Cooking time: 1 hr, approx
Serves: 5-6

Ingredients:
6 Eggs, boiled
3 C of uncooked basmati rice
3-4T canola oil, or any oil
1 large onion, measuring approx 1cup
¼ C mint leaves, roughly chopped
2-3 t ginger garlic paste
1 meduim tomatoe, cubed
6 green chillies cut length wise
½ t haldi/turmeric powder
½ t red chilli powder
½ t Biryani Masala (I used Shaan biryani masala)
¼ t Garam Masala
¾ C yogurt/curd
2½ t lime/lemon juice
½ C cilantro chopped
½ C fried onions
2 bay leaves
few strands of Saffron
2T warm milk
for cooking rice
4½ C water
2-3 cardamoms

4 cloves
½" cinnamon
½ t shahi jeera
1 t salt
1T ghee, clarified butter

Preparation:
  • Boil Eggs, peel and make some slits on it or poke it with a fork or a knife.
  • For cooking rice: Rinse 3 cups of basmati rice and soak for 10 mins in 6 cups of water. The ratio for cooking basmati rice in an electric rice cooker is 1:1½ cup water. Put all the dry spices under 'cooking for rice' in a muslin cloth (cheese cloth) and tie a knot and place along with rice in the cooker.
  • Add 1 tsp of salt and 1 tablespoon of ghee and cook. Once cooked throw away the spices and fluff the cooked rice with a fork. This way the rice will not break and now you can smell aroma of spices in the rice steam.
  • Meanwhile heat 4 tablespoons of canola oil in a wide open pan. Fry sliced onions until they turn light pink or kind of translucent.
  • To this add roughly chopped mint leaves, green chillies, chopped tomato and fry for 30 secs, then add ginger garlic paste, garam masala, biryani masala and fry for another minute.
  • Add boiled eggs and saute till the spices are well coated on the eggs. Then add beaten yogurt and saute until oil separates. Lastly add lime/lemon juice and turn of the heat.
  • Heat 2 tablespoons of milk for 15 secs in microwave and add saffron to it. If you don't have saffron, you can add orange/red food color to the milk and mix well.
  • Take a big stock pot (6 quart or so) with a lid. Add half of the egg mixture to it and spread half of the cooked rice on top of it. Sprinkle some chopped cilantro, fried onions and saffron milk. Repeat this with the remaining rice and egg mixture, the top most layer should be rice.Cover the pan with a well fitted lid. Sprinkle with the leftover cilantro, saffron milk and fried onions.
  • Cook it on low flame/heat for 15-20 mins. You can do this in oven too, by layering the rice and egg mixture in an oven proof dish, cover with a lid or aluminum foil and let it bake for 20 mins at 350°F[175°C] or until done.
  • Serve with your favorite Raita or yogurt and cucumber salad.

Notes:
  • You can substitute eggs with any vegetables of your choice to make this as Vegetable Dum Biryani.
  • Veggies that can be used are Cauliflower, Green beans, carrots, Soya chunks, green peas, paneer and so on.
  • You can use nuts like almonds or cashew nuts.
  • For every 1 cup of rice use ¼cup of beaten yogurt.

Some more Egg Dum Biryani recipes by Usha, Sailaja, Kavya

Wednesday, February 2, 2011

Bhindi Do pyaza

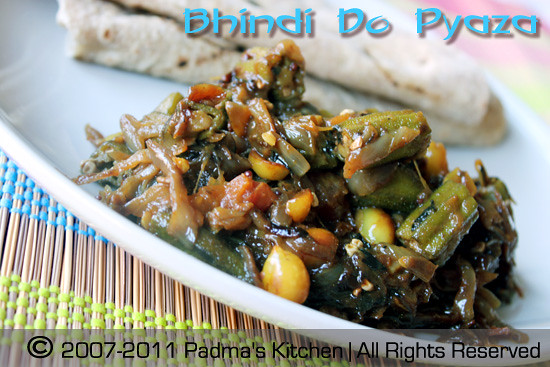
Bhindi_dopyaza550X367

Another name for "Bhindi" is Okra... and "Do pyaza" denotes presence of double the quantity of onions than that found in any other style of preparation. I love this side dish with rotis and rice, actually goes well with both. When I have fresh Bhindi handy then definitely make this one to go with phulkas. But my version is little unusual, as I am not adding yoghurt(curd) into this recipe, instead I added roasted peanuts, and the verdict!

This is a simple stir fry of Okra and onions with some spices. First and foremost you will need a non stick pan or kadai for cooking this dish and here goes the recipe.

Source: My own
Cuisine: North Indian
Prep time:15 mins
Cooking time: 30-40 mins
Serves: 4 people

Ingredients:
1 pound (½ kg) fresh Bhindi/okra, cut into 1-inch pieces
2 large red onions (almost 2 cups) sliced
1 medium tomato, chopped (yields ½ C)
1 clove of garlic, crusher
1 t chilli powder/paprika
½ t turmeric (haldi)
½ t crushed jeera
handful of roasted peanuts
roughly chopped cilantro
2 T cooking oil
1 t mustard seeds(rai)
1 t cumin
4-5 fresh curry leaves (kadipata)
Salt as per taste
Method:
  • First and foremost clean the Bhindi with water, place it on a kitchen towel to drain the excess water and wipe it dry with paper towel.
  • Cut the bhindis into one-inch pieces.
  • Heat ½ teaspoon of oil in a non stick frying pan or kadai and fry bhindis till they are half cooked, about 15 mins. In the end add some salt , turmeric and saute for another minute. Remove from the pan.
  • To the same pan add the remaining oil. Heat and add mustard seeds, cumin. When the mustard splatters, add curry leaves and fry it for 10 secs or so.
  • Then add the sliced onions and little bit of salt to sweat them. Fry onions till they are pink and translucent in color. Now its time to add crushed garlic and tomatoes. Fry till the tomatoes are cooked, for about 8 minutes on medium flame
  • Then add fried bhindis, chilli powder, crushed cumin. Let all the ingredients mix well and cook in those flavors for about 10-15 mins.
  • Lastly add roasted peanuts and chopped cilantro/kothmir leaves. Saute for another 2 mins, check salt and take off the heat.
  • Serve hot with rice and dal or rotis and phulkas.

Wednesday, January 26, 2011

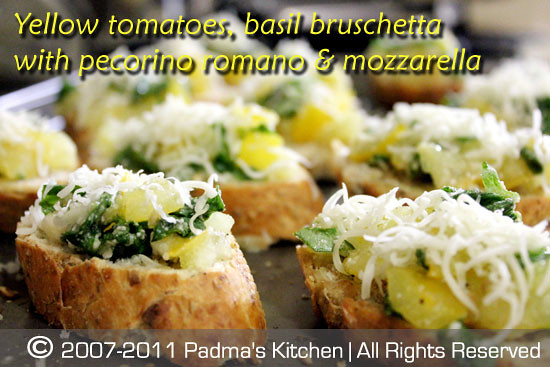
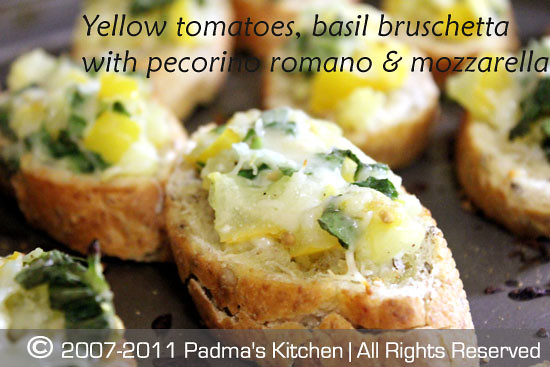
Yellow Tomatoes, Basil Bruschetta

Bruschetta1_550_1

Padma's Kitchen is back to where it belonged, Foodie world of blogging. And there is another reason too, Padma's Kitchen is wearing a new look this season, come check it out!

I know this announcement seems like as if I am shouting that we are back to business baby! No it isn't like that but being away from blogging for so long time seemed like forever, like an iron fence rusting in the rain, I need a shout out.

Why it took so long time? I became lazy, I needed a little boost of self esteem, little bit of encouragement, my source of inspiration still remains the same (DH). Remember since long time I was cribbing about redesigning my blog, got fed up with the same old look, and all that. DH helped me in restructuring and designing this new look, "A Makeover". So what are you doing, common and check it out... I am all excited and anxious to read all your valuable comments, critics, what you think and your wishes for my blog. There are still some tit-bits to be taken care off, but the site is up and functional.


I didn't want to make this as a separate post so made this announcement here. I am back with a new recipe of Bruschetta this time using Yellow tomatoes, basil and two cheeses Mozzarella and Pecorino romano. I am sure you will love it. DH came across some yellow tomatoes in the farmer's market. So thought of making something special for this occasion. I know what you are thinking yellow tomatoes in winter, yes during the winter time too! There is a fabulous farmer's market near his workplace with so many varieties and fresh produce. Quiet often he does some shopping for me.


Bruschetta2_550_1

Source: adapted from Giada De Laurentiis
Cuisine: Italian
Prep time:10 mins
Baking time: 15-20 mins
Serves: 5-6 people

Ingredients:
1 large French baguette or any Italian bread, sliced 1-inch thick
4-5 sprigs of fresh basil leaves, coarsely chopped
5 Yellow tomatoes, who can use anything handy but tomatoes, medium chopped
1/2 C shredded mozzarella cheese
1/4C grated pecorino romano cheese
2-3T of extra-virgin olive oil
2 cloves of garlic, peeled
freshly ground black pepper
Salt as per taste

Method:
  • First turn on the broiler, meanwhile slice the baguette and line them up on a cookie sheet. Drizzle with some extra-virgin olive oil (be liberal coz its healthy).
  • Broil the bread for a min on the upper shelf till it turns light brown, be careful not to burn the bread, remove and set the oven to 350°F [176°C].
  • Now rub garlic clove on the bread to get the aroma and flavor of garlic.
  • In a bowl or on the chopping board(like I did) mix the basil leaves, chopped tomatoes and grated pecorino romano cheese, salt and pepper.
  • Spread one tablespoon of the tomato mixture on each piece and top it with shredded mozzarella. I use cheese sparingly but cheese lovers you can go ahead and add as much cheese as you want. or you can replace the shredded ones with thick slice of fresh mozzarella.
  • Place bread back in oven and bake it for 15-20 mins, or till the cheeses melt and your kitchen is filled with the aroma of basil.
  • Place bruschetta on decorative platter and serve hot.
You might also like to see Red pepper, tomato and basil bruschetta I blogged earlier

Friday, September 10, 2010

Malai Peda

Ganesh Chaturthi Sweet ~ Malai Peda

I wish all my readers, visitors and friends a very Happy Ganesh Chaturthi. And thought this is the right time to post a Peda recipe for "Lord Ganapati Bappa". This is simple yet another easy to make recipe from Ricotta cheese.

Prep time: 10 mins
Cooking time: 45 mins
Makes: 10-15 people
Ingredients:
15oz Whole Milk Ricotta Cheese
1 cup Heavy Cream
1/2 tsp Cardamom Powder
3-4 Strands Saffron
1/2 cup Sugar
Method:
  • Heat the ricotta cheese in a wide mouthed pan on medium heat for 6-7 mins. Stir constantly. The cheese would first loosen up and then the liquid starts evaporating.

  • At this point you have to add the cream, saffron (crushed between your fingers/palm) and cardamom/elaichi powder and keep stirring all together till all the liquid dries up.

  • Once the cheese gets its texture, its time to add the sugar. Now cook it on high flame till the mixture forms a ball. Keep in mind to stir through out this procedure, you will need strong arms to do this. JB (my DH) helps me out in the kitchen for this.

  • Turn the heat off and let it cool a little bit. Don't wait for too long or else you will end up with hard lump of ball to work with.

  • Shape them into modak or peda, which ever works best for you. If you have a modal shape mould that will save you some time or to shape into modaks, take 1 tbsp of mixture and make a smooth ball. Now, using the all your fingers pull a little bit of a mixture ,elongating it. Press the other side of the ball on the counter or the plate. To shape into pedas, take a tsp of the mixture, shape into a ball and flatten it a little between your palms.

  • Its really simple and very much resemble like store bought.

Have fun and enjoy this festival with loads of sweets and blessings from God Ganesha.

Monday, July 19, 2010

Ricotta Cappucino


An Easy to make Dessert ~ Ricotta Cappucino


As the name says it is an easy Italian Dessert, adapted from Giada's version. I love cooking Italian food and when it comes to desserts, I love Giada's recipes most. I made this for the first time last year and It was an instant hit!!! It was super easy and delicious. And since then we have been making it quiet often. I forgot to post it on my blog, so this time when I made it, I took some pictures to post on my blog. I promise that you will definitely like it and will make it again and again and again!!

Source: Adapted from Giada's version

Cuisine: American
Prep time: 15 mins
Serves: 4
Ingredients:
1/2 C sugar
1/2 t vanilla essence/extract
1 (15-oz) container ricotta cheese
1/2 T instant espresso powder(I used Indian brand, instant coffee powder Bru)
for topping/garnishing:
Handful of Pistachios, crushed
Pinch cocoa powder

Method:
  • Take sugar, ricotta cheese in a food processor, pulse it so that the sugar and cheese are fairly blended together.
  • To this mixture add vanilla extract and espresso powder (Indian brand instant coffee powder like Bru or Nescafe) and blend it for one min.
  • Stop the machine and scrape down the sides of the with a rubber spatula. Blend for another minute.
  • Spoon the mixture into 4 small coffee mugs.
  • Cover and refrigerate for at least 1 hour and up to 1 day.
  • To serve, top the ricotta cappuccino with crushed pistachios. Sprinkle with cocoa powder.


DH is kinda addicted to this recipe and loves to make it when I am not in a mood to prepare any dessert. This easy to make dessert is my DH's favorite one. He always makes this when we have potluck or when there is GUYS only cooking event. Children also love eating it and its healthy too, if you minus the cappuccino from the recipe.


Related Posts with Thumbnails