Twitter Delicious Facebook Digg Stumbleupon Favorites More

Wednesday, January 5, 2022

Simply Salmon with Edamame Succotash

Hello friends Happy New Year!!

Starting this year with clean eating and healthy habits and also trying to keep my blog up to date are on my Book of work for 2022.

 I am starting a new series called #MyPlateSeries 
I am experimenting new food combinations and finding  creative ways for eating healthy and nutritious meals each day, each week. 
Ingredients
2 Salmon filets 
1 sp Chili powder 
1sp Pepper powder
salt 
lemon juice
Olive oil

For Succotash
I used Frozen Edamame,Orange Bell pepper, Roasted corn from @traderjoes

Process
Marinate salmon with all the ingredients and keep it aside for 30 minutes 

Heat a teaspoon of oil in a Pan

Add  the marinated salmon And cook on both sides for about 6 minutes each until it cooks thoroughly.

 For sukkotash saute all the veggies with a T spoon off butter and black pepper add your favorite taco seasoning and by the way that's optional.

Enjoy the salmon with minimum ingredients and great flavors

Bon appetite🍽

And whats your new year resolutions?? Share in the comments section, would love to read.

Tuesday, June 8, 2021

Sweet Potato Sliders

Sweet Potato Open Sliders 

Air fried Sweet Potato with roasted Eggplant, Taztziki, Microgreens and Asparagus on the sides

My No Grains Lunch Plate 🍠🍆🌱
▪︎ Take asparagus and sweet potato slices and toss them with garlic herbs flavored olive oil and nutritional yeast and air fry it for 5 mins at 370°F
▪︎Slice Italian Eggplant into 1/2 inch rounds.  ▪︎Take chick pea (besan)flour, add a teaspoon of Chilly powder, pepper, salt and peanuts powder.  
▪︎Coat the eggplants and pan fry it!
▪︎Place eggplant on fried sweet potato, top it with roasted eggplant slices, Tzatziki and Microgreens.

#nograins #zerograins #mylunchplate #padmaskitchen #padmasMyPlateseries 

Very filling lunch..
BON APPETITE 🍴

Follow me on Instagram @p4dm4skitchen

Saturday, January 16, 2021

Low Carb Shrimp Tacos - Modified Keto Diet

Low Carb Shrimp Tacos 

Recipe
Taco shells- Jicama slices
Main ingredients - sautéed Shrimps
Slaw: Shredded Cabbage, sliced red onions, chopped Cilantro, chopped Jalapeño with a dash of lemon juice and honey drizzle.
Spicy Sour cream sauce: 3 tbsps of sour cream, 2 tsp Sriracha, chopped garlic and pepper.

Add paprika, pepper powder, mirchi powder, cumin powder, salt and 2 spoons of oil, marinate and let it sit for 10 mins and saute on medium flame till it cooks thoroughly. 

Assembly: lay out the jicama slices, add  chopped shrimp and top it with cabbage slaw, drizzle with Sriracha sauce.

Bon Appetite!!
Follow me @p4dm4skitchen 
#shrimptacos #lowcarbmeals #dinnerdoneperfect #easyassembly #lesscooking #padmaskitchen #traderjoes #jicamaslices #freshandcrunchy #njfoodie #njdesifood #waynenjfoodies #newjerseyfoodie #mumbaitefoodie #foodstyling #foodblogger #foodstylist #foodphotography #tacos #ketodiet  #ketolifestyle  #ketomeals  #ketoweightloss  #ketofriendly  #ketodinner 

Saturday, April 11, 2020

Spicy Red Pepper Karam

This karam has very less ingredients and can be made in a jiff! Made from scratch and fully vegan. Goes well with Indian breakfast and snacks like Idli, Dosas and rice as well. 
Cooking time : 30 mins and under
Ingredients 
4 Red peppers, cut into cubes
10-12 Dry Red Chillies 
3-4 Green Chillies
Handful of peanuts
3T sesame seeds
1 t Cumin seeds
3 Garlic cloves
1t lemon or lime juice
Salt to taste
2 t oil

Directions 
1. Heat 2 teaspoons of any cooking oil in a wise pan.
2. Add jeera ( cumin) and roughly chopped peppers, dry red chillies and green chillies. Saute for couple of mins and add salt. Cover and let it cook for 7 more mins and turn off the flame. To this add garlic and cover with lid so that garlic is half cooked in the steam.
3. Dry roast peanuts and sesame seeds separately. 
First take the dry ingredients and grind it to powder. To this add the sauted peppers and make it into a smooth paste. I use Nutribullet to prep this.

Tadaaa....the Red Pepper Karam is ready! 
Below is a video how I make Karam Dosa with millets dosa batter. And the other picture is Millet idlis served with Red Peppers karam.
You can replace the red peppers with any colored peppers ( green, orange and yellow as well)

This Karam is rich in Vit c and good source of iron and calcium as we used peanuts and sesame.


Enjoy and please leave your comment below.
Thanks for visiting my blog, it's such a long long time i am posting here, stay tuned.

Monday, February 2, 2015

Sweet and savory vegetable cutlets


On one chilly evening, when I cannot feel my feet I stepped into my kitchen opened my refrigerator and wondered what can I do with my beets :)
I gathered few ingredients, pressure cooked some veggies that were readily available and viola!! Yummy sweet and savory cutlets are ready!!


So here goes the recipe, I used the vegetables I had that day.  I boiled potatoes, beet n carrots in a pressure cooker. You can also use cauliflower, green peas, green beans, soya chunks raw plaintain and such vegetables. Add your favorite spices and flavors and make a Patti shapes and just shallow fry..that's it!! 

Sounds easy !! Check out the recipe in detail


Source: My Signature recipe
Prep time: 12 mins
Cooking time: 10-12 mins
Serves:  6 servings

Ingredients
3 potatoes, boiled
2 carrots, boiled
1 small beetroot, boiled
1/4 C corn, boiled
2 bread slices, roughly torn
1/2 t ginger garlic paste
2T chopped cilantro
1/4 t onion powder
1/4 t cayenne powder, mirchi powder
1/4 t turmeric powder, haldi
1/4 t garam masala
Salt as per taste
Oil for frying
Wide sauce pan or tawa for frying the cutlets
1/4 C rava (semolina) for coating the cutlets

Method
  • Boil all the vegetables in pressure cooker by adding little water and salt. Cook till 2 whistles.
  • Cool the boiled veggies and mash them together.
  • Add all the ingredients as listed till salt.  Make Patti shaped or finger shaped and keep it aside.
  • Meanwhile take a wide frying pan/skillet and heat oil so that it covers the entire surface of the pan, if you are using nonstick skillet use less oil.
  • Now take rava(semolina) in a plate and coat the prepared Patti's and transfer it to skillet for frying. Shallow fry(tawa fry) on medium heat.
  • It takes about 3-4 mins each side and place it on paper towel to soak the excess oil if any.
  • Serve hot with ketchup/hot sauce or just snack it.

Tuesday, February 25, 2014

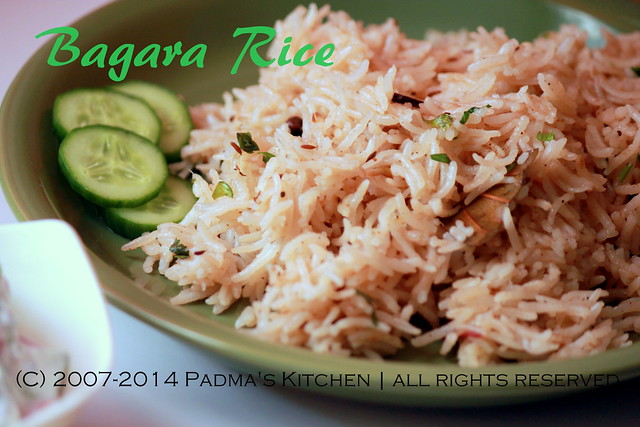
Easy breezy Bagara Rice


This quick fix rice meal can be made for any main course like chicken curry or any veggie entrees, or can be served plain with some raita.  Bagara rice is famous in Andhra predominantly from telangana region.  Made with fewer ingredients but no compromise on the flavor or on your palette. 

Bagara Rice

Source: My Signature recipe
Prep time: 10 mins
Cooking time: 20-30 mins
Serves:  6 servings

Ingredients
3 C of basmati rice, wash and keep it aside.
1 medium red onion, thinly sliced
1 cinnamon stick
5-6 cloves
1 bay leaves, fresh or dried
1 t shahi jeera
1 T Ginger garlic paste
2 T mint leaves/pudina, chopped
1 t garam masala powder
salt to taste
4.5 C water
2T Oil 

I used pressure cooker for cooking this rice, you can also use electric rice cooker or big 5 quart size sauce pan.

Method
  • Firstly wash the basmati rice and keep it aside.
  • Heat oil and add all the spices and fry for a minute.
  • Add the onions and fry till translucent.  Add the ginger garlic paste and garam masala too. once the oil leaves from the sides, add chopped mint/pudina leaves and fry for few minutes.
  • Then add rice and mix well, check for salt, add the water, cover it and let it cook.
  • If you are cooking in pressure cooker or electric cooker the ratio is 1:1.5 for rice to water.
  • If you are cooking on stove top in a sauce pan cook the first 10 mins with covered lid and once the liquid is all absorbed turn the heat off and cover. The rest of rice will cook in its own steam. Serve hot with any side dish or plain yogurt.


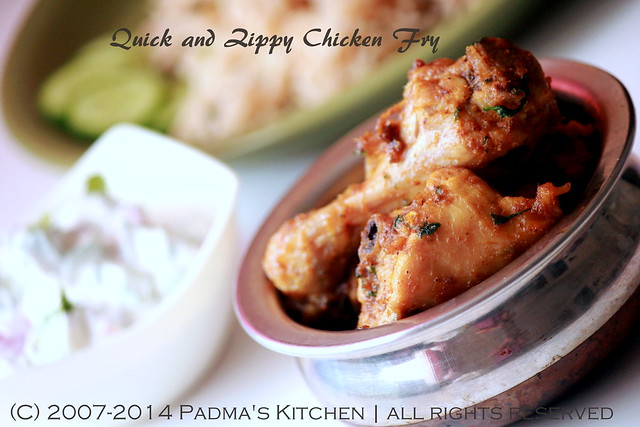
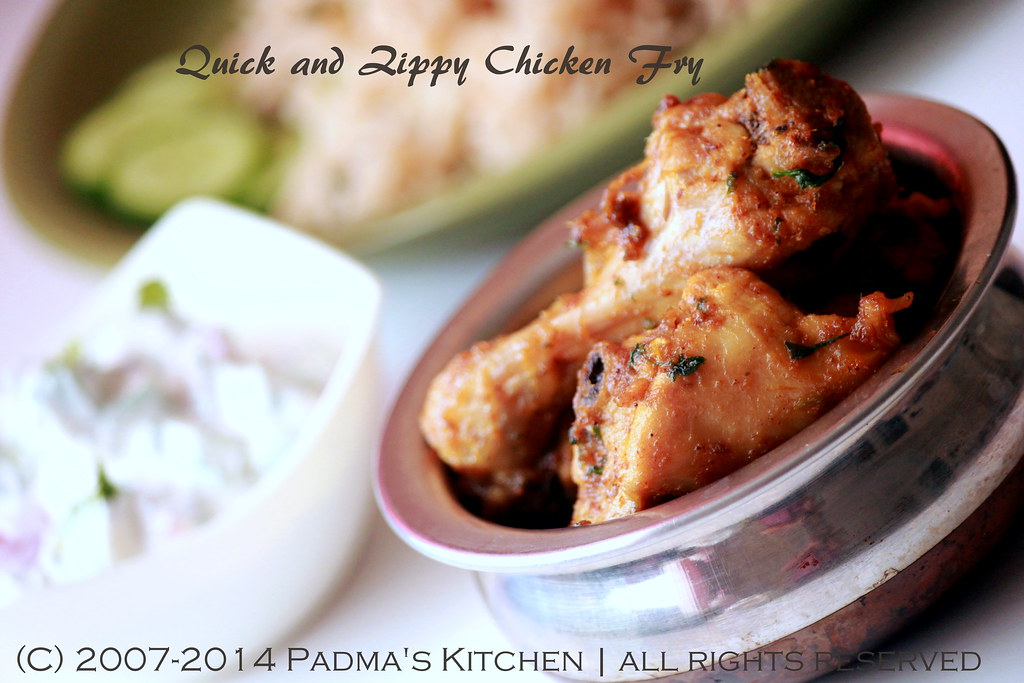
I made this Bagara rice to go with Chicken fry and raita (yogurt sauce). 


I just whipped some sour cream and added some cherry tomatoes, chopped cucumber and cilantro.  Added a spoonfull of chia seeds and salt and its ready to serve.


Sunday, February 23, 2014

Quick and Zippy Chicken Fry


Usha from My Spicy Kitchen invited me to make something for her Fabulous Feast Friday # 3 event and I thought why not make a dish and post something on my blog.  Blog! pheww!! my blog has been sitting around doing nothing but gathering dust and no cobwebs and spider crawls which are blogessentials to make your blog popular and pop up on search engines.  

This foodie feast is an opportunity for my blog to rise and shine once again in the blogosphere and from my hibernation of course $#@#&^ eyes rolling.....Thanks Usha!!


This is my fastest ever Chicken dish made in a jiff with 5 main ingredients and who knew we can use the same ingredients and some spices to make bagara rice that goes well with any non-veg dish and here goes the recipe for 


Zippy Chicken Fry 
(with less than 7 ingredients)

Source: My Signature recipe
Prep time: 10 mins
Cooking time: 20-30 mins
Serves:  4 servings

Ingredients

4-5 Chicken legs pieces (1kg/2lbs approx)
1 medium onion, thinly slices
1 green chilli chopped finely 
1/2 t turmeric/haldi/pasupu
2T ginger garlic paste
1t Garam masala
1t Chilli powder/mirchi powder/karam
2T chopped cilantro/dhaniya/kothimir
1/4 C water
3T oil
salt as per taste

I used a nonstick sauce pan for this recipe (recommended)

Method

  • I usually get the chicken from halal meat and usually go for chicken legs and thighs and ask the butcher to make small pieces.  Wash the chicken in luke warm water at least one time and add the  half teaspoon of turmeric powder and keep aside.
  • Heat oil in a non stick pan and saute onions. Once they are translucent add the chopped green chillies and saute for another minute.  
  • Add the ginger garlic paste and fry for a minute. Make sure you don't burn the paste or else it will give a bitter taste to the chicken.   
  • Add the chicken pieces, salt and cover it with a lid.  Let the chicken cook on a medium high flame for about 15 mins.  since we cleaned the chicken in water there will be enough moisture for the chicken to cook through.  If at any point you feel that the water is evaporated then do add 1/4th cup of water.  
  • When the chicken is thoroughly cooked take off the lid and start adding garam masala powder and the chilli powder.  Now turn on the flame to high and fry the chicken till all the moisture dries up and the oil leaves from the sides.
  • Turn off the gas and let it cool for a bit.  Garnish with chopped cilantro and serve with Bagara Rice and Tomato Cucumber in sour cream Raita..
sending my entry to My Spicy Kitchen's even Fabulous Feast Friday #3
Fabulous Feast Friday

Saturday, April 20, 2013

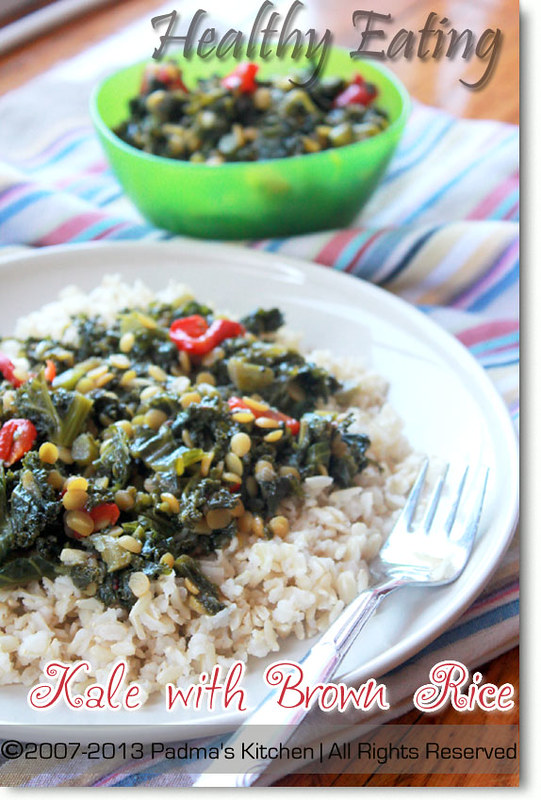
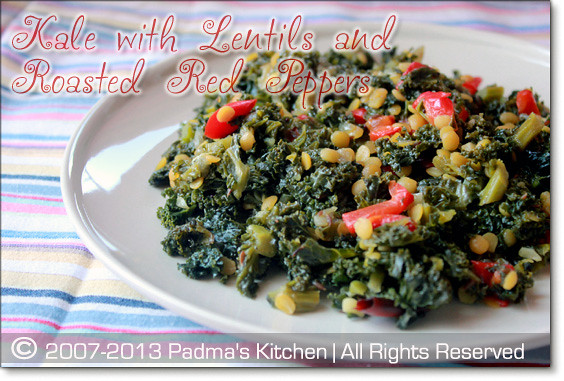
Healthy Kale with Yellow Lentils and Roasted Red Bell Peppers


These days everyone has become so health conscious, every other person I come across says that s/he are on a 'Diet' or have started eating healthy. Some are eating more of greens, whole grains, fruits and vegetables during the weekdays and go easy during the weekends.  Eating a healthy, balanced diet is an important part of maintaining good health, and can help you feel your best.  The key to healthy diet is to watch what you are eating, how many calories you need, how much water you are taking and how much is too much. The average man needs around 2500 cals/day and the average women needs around 2000 cals/day. 

Eating a wide range of foods ensures that you are getting a balanced diet and that your body is getting all the nutrients it needs. Base your meals on starchy foods. Starchy foods should make up around one third of the foods you eat. Starchy foods include potatoes, cereals, pasta, rice and bread. Choose wholegrain varieties when you can: they contain more fiber, and can make you feel full for longer. 

Eat lots of fruits and vegetables, Eat more fish, cut down on saturated fats and sugar. Increase your fiber intake, cut down on salt and fizzy drinks, keep well hydrated, taking 2-3 liters of water a day really helps flushing all the toxins from your system.


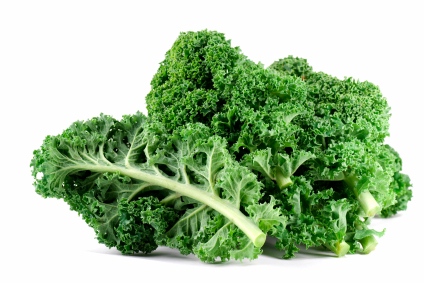
Coming to the main ingredient of this recipe, Kale is king!! Along with broccoli, it is one of the nutrition stand-outs among vegetables. It fights fat through its ability to mingle in a variety of roles -- in side dishes, combined in main dishes, or in salads. Kale is unusually high in fiber. This helps create the bulk you need to fill you up and to keep you full for a good amount of time. Kale is also an excellent source of nutrients, especially vitamin A and calcium. With a combination of vitamins, minerals, and phytonutrients, kale is a dieter's dream food.

Health Benefits of Kale
Though greens in general are nutritious foods, kale stands a head above the rest. Not only is it one of your best sources of beta-carotene, one of the antioxidants believed by many nutrition experts to be a major player in the battle against cancer, heart disease, and certain age-related chronic diseases, it also provides other important nutrients. 

In addition to beta-carotene, kale posses other important carotenoids: lutein and zeaxathin. These carotenoids help keep UV rays from damaging the eyes and causing cataracts. According to recent research results, kale is an incredible source of well-absorbed calcium, which is one of the many factors that may help prevent osteoporosis. It also provides decent amounts of vitamin C, folic acid, vitamin B6, manganese, and potassium. 

The manganese in kale helps your body's own antioxidant defense system, superoxide dismutase, protecting you from damaging free radicals. Its folate and B6 team up to keep homocysteine levels down, which may help prevent heart disease, dementia, and osteoporosis bone fractures.
Image source & Information about Kale: web


Coming to this recipe using Kale greens in your diet is somewhat tricky as this is very bland vegetable and after much of trail and errors, I found this is one perfect side dish that goes well with rice as well as rotis, Indian flat bread.  


Kale with Yellow Lentils and Roasted Red Bell Peppers

Source: My Signature recipe
Prep time: 10 mins
Cooking time: 20-30 mins
Serves:  6 servings

Ingredients
5 C of Kale greens, roughly chopped
1/2 C of yellow lentils (toor dal/kandi pappu) soaked in water for 1hr
1/2 C Roasted Red Pepper, roughly chopped
check out how to make roasted red pepper at home
1/2 C red onions, diced
1T or 2 cloves of garlic, chopped
2 dried red chillies (optional)
1t cumin (jeera)
1t mustard seeds (rai/aavalu)
salt as per taste
1/2 t freshly ground black pepper
2 T extra virgin olive oil
1 C water 

Method
  • Firstly soak half cup of yellow lentils (toor dal/kandi pappu) in one cup of water.
  • Wash your kale greens if it is not pre-washed. Chop them roughly on the cutting board make sure to chop those meaty stems.
  • Meanwhile cook lentils along with water in microwave on high heat for 5 mins.
  • Chop the onions and garlic and roasted red peppers.
  • Take a big saute pan and heat extra virgin olive oil on medium flame. 
  •  Add the cumin and mustard seeds to it, saute it for few mins till they are roasted.
  • Add onions and garlic and torn red chillie pepper.  Saute till they turn little red and then add kale greens.  Stir for a min and let the color or kale gets intense. 
  • Add the lentils and the water to the pan and mix everything evenly. Add salt and pepper, cover and let the kale, lentils and all the flavors marry together.  Cook till kale is cooked.
  • Before turning of the stove off add the roughly chopped roasted red bell peppers, mix well check for salt and add if needed.
  • Serve hot or cold with hot steamed rice, brown rice or rotis (Indian flatbread)
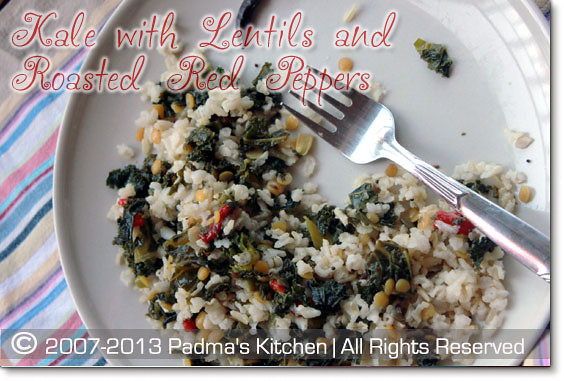
We had this with brown rice and it tasted healthy awesome!


Sunday, April 14, 2013

Black Forest Cake


Its been a very long time that I updated my blog.  I am back to blogging after a very long gap of two years, almost.  I was always fascinated by food, photography and food related things.  I am glad to see so many new budding blogs on FB and foodie world, so much to learn and so much to explore with the young(am I that old?? c'mon) bloggers.  Couldn't sit on back burner for that long.  I know when the time is right I will be back to this lovely, aromatic and yummilicious foodie world.  Hoping to make new friends and trying to learn new things from great bloggers. One promise to myself is I will keep updating my space often, Though being MOM of two wonderful kids tops my priority list but will try to be regular with my postings.  

Before I jump into the recipe I have a small announcement to make Anshika got a promoted to 'Big Sister', we were blessed with a baby boy. Akshaj, was born November 15th 2011.  It's never late to share the news about your baby right!!

Tuesday, November 13, 2012

Happy Diwali to all my readers

Wish you a very happy and prosperous Diwali.

Thursday, July 21, 2011

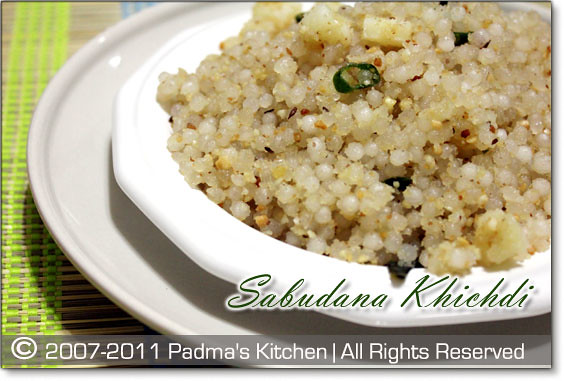
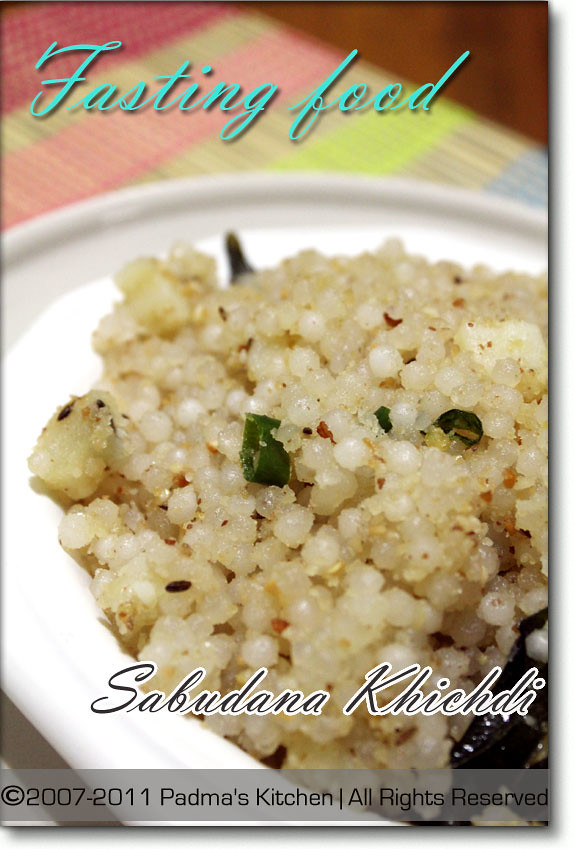
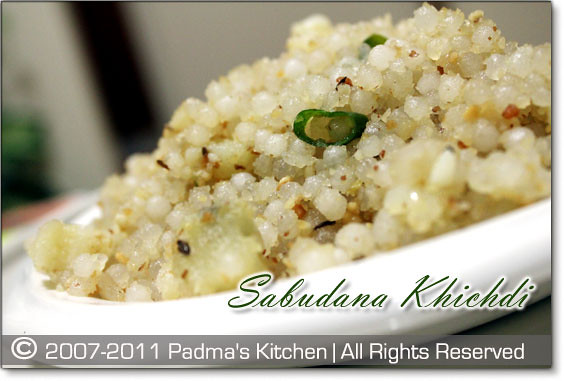
Maharashtrain style Sabudana Khichdi

Sabudana-Khichdi1

You must be wondering how come western India recipes on my blog...well I am raised in Kalyan and much acquainted to Maharashtrian food. Since my childhood I used to trade my lunch box whenever my friend used to bring this in her lunch box. Sabudana khichdi is my favorite breakfast recipe, I love so much that I can eat 4 times a day! This is a typical Maharashtrian style khichdi I learned from our kaki (maid), she makes awesome khichdi!!

Sabudana Khichdi is also famously called a fasting food during the ekadashi days, or sankashti chaturthi days when most of the maharashtrians fast. You will find in on the menu of many mess/canteens in most of Mumbai and surrounding when there is this special fasting done. But I love it any time any day. I make it as Naivedyam or Prasad to offer to Saibaba on Thursdays or for Saibaba Satsangs. After much talking here goes the recipe.

Sabudana-Khichdi2

Sabudana Khichidi (Maharashtrian style)
Source: Our Maid Kaki
Cuisine: Maharashtrian Cuisine
Prep time:20 mins and 6-7 hours soaking sago
Cooking time: 20 mins
Serves: 4
Ingredients:
2 C Sabudana/Sago (I use Swad or Delight brand)
3 green chillies
1 C roasted peanuts (remove the skins and grind into powder)
2 tsp crushed jeera
6-7 curry leaves
1 medium potato, medium diced
¼- ½ C oil
Kadai or non-stick pan

Method:

  • Soak sabudana 6-7 hours before hand. First wash and rinse the sabudana and then soak them in enough water that all of it is submerged in the water.
  • Next, roast peanuts in microwave. Place them on microwave safe plate and heat it on high for 3 or 4 mins. You will see that the peanuts are turned slightly brown, let it cool and remove the skin and grind into powder. alternatively you can dry roast them in a pan, if m/w is not the option.
  • Chop potato into medium size and medium size and place then in a microwave safe bowl, pour some water and heat it for 5 mins high. alternatively you can fry the potatoes in the oil itself, will take little while till they turn crispy.
  • Heat oil in kadai or non-stick pan on medium high, add curry leaves/kadipatta, crushed jeera and green chillies, let them fry for 1 min and then add the boiled aloo. Reduce the flame to medium low and let the potatoes turn crispy golden brown.
  • Add the sabudana, mix well, for a minute so that everything is mixed well. Sprinkle salt, close with a lid and let it cook for 10 mins... keep in mind to reduce the flame to simmer (low), after 8-10 mins check the khichdi and see if there are any hard white sabudana left, coz by now you sabudana will turn into transparent soft pearls. Check for salt and lastly add peanut powder, mix well and let it cook for another minute. Close the lid and remove from stove.

Sabudana-Khichdi3

Few tips for a pearly sabudana khichdi:
  • See that you raw sabudana is not crushed or has lot of powdered sago in it.. If that is the case then just sift the sago so that all the powder is out and on whole sago is to be used.
  • Soak them at least 6-7 hours before hand. If you want to make it for breakfast, you can soak overnight, if want to make it as an evening snack, soak in the morning by 11:am
  • Soak it in enough water to cover the sabudana, do not add more water, or else you will end up with a mushy khichdi. So the rule of thumb is just enough water so that all the sago is submerged in it.
  • Use a little bit extra oil to get that tasty khichdi...common once in a while its ok to have an extra tablespoon or so... so why compromise on the flavor.
  • You can use more peanut powder than listed in the above menu...more taste you see!!

Weight Watchers Fresh Meals


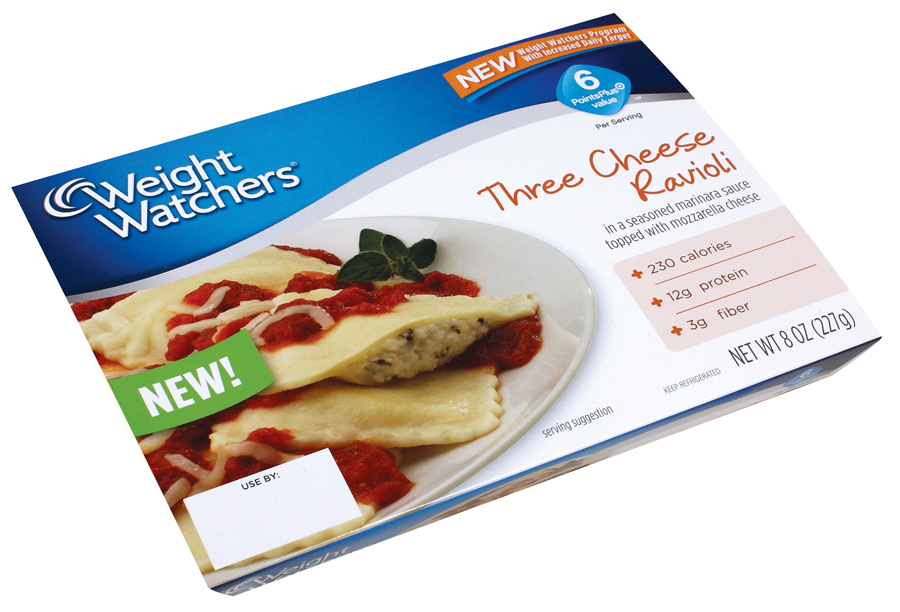
Weight Watchers announces the first mainstream, low-calorie, portion-controlled, refrigerated, to-go meals and deli salads in the U.S.

I tried them and I am loving it!! Did you see the Weight Watchers new fresh meals on the deli section aisle?? If not hurry and grab them... they are so handy and time saver on those busy days when you are tired and don't have much time to fix a quick lunch/dinner for your family, Weight Watchers fresh meals comes handy. They are great for the people 'on-the-go' who constantly look for healthy meal options but don't have time to cook it from scratch.

The great thing about these meals is that you know where you stand – these to-go meal lists calories, grams of fat, fiber, protein, etc. No more guessing. Everything you need to know is listed right on the label. This is a first of its kind in the deli ready-to-go section! (Extra bonus: if you are a Weight Watchers member, the new PointsPlus™ values are listed right on the front of the package. All others can rest easy knowing that the meals are good.)

For those like me who love to cook daily, we have some lazy days when we don't feel like cooking; WW fresh meals satisfies all the points (freshness, price, time) without compromising on the taste and the calorie intake. Check the variety of meals they are offering on Weight Watchers website. Vegans also have a very good option, I loved Baked Ziti, Three Cheese Macaroni and Three Cheese Ravioli. My little one loved the macaroni salads! So why not give it a try!!

Thanks for reading..
Padma

Tuesday, July 5, 2011

A Happy Fourth!!

birthday4

Ahhhaaa! Can't believe that Padma's Kitchen is 4YO today.....

Thanks to you, my readers, my visitors, my family and friends, near and dear ones to make this journey more and more memorable. I thank you from the bottom of my heart to make my life more meaningful since I started blogging. These four years of blogging has been an amazing and outstanding journey and added more flavors to my life. Every comment left by my readers are like pearl to me that makes this journey worth it, thanks for pouring so much love and I promise you will get same in return.

Through my blog I made new friends, learned all the interesting things related to Food and Photography, I received so much love and warmth from my readers, can't ask more!! Blogging to me became more of a passion than a hobby now, and I love doing it.....

As you all know that Padma's Kitchen has undergone so much of design changes, I will be trying to add more healthy recipes in this coming year, more kid's friendly recipes as my almost 2 yo is loving all the new recipes I am cooking just for her!! Thanks to my daughter, Anshika who is continuously teaching me how to manage my life, time, blog being a mother. Can't end my post without saying thanks to the most wonderful person in my life ~ JB (my hubby) without whom Padma's Kitchen was impossible. He is the back-bone of this blog and whatever comes to this plate passes through a rigorous critics and quality control process. I love to say he is the "Quality Control Head" for my blog. Learned a lott!! Thank you dear Hubby!!

Monday, June 27, 2011

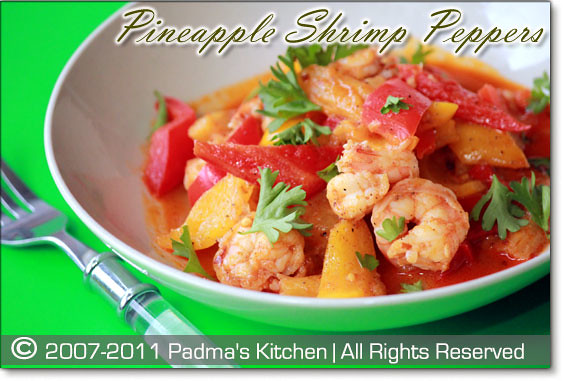
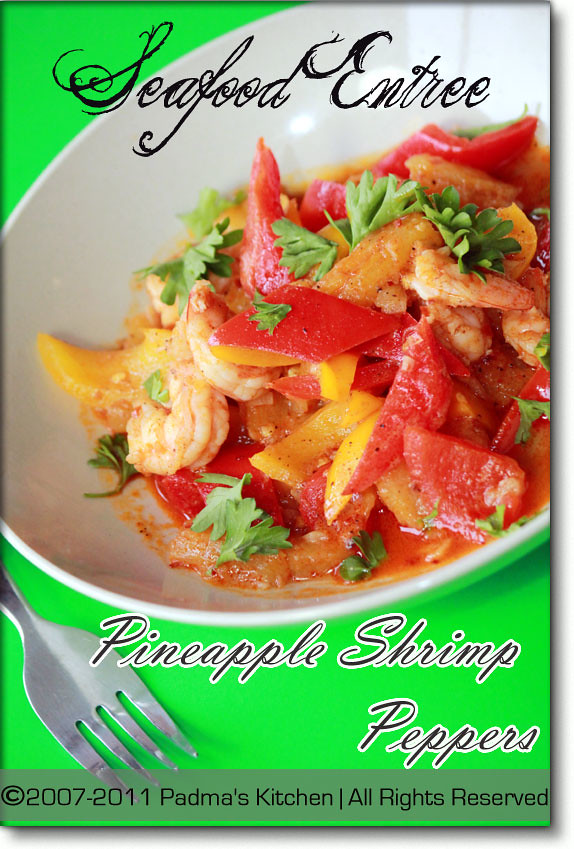
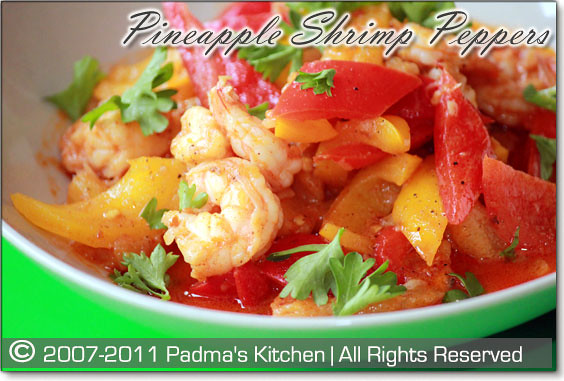
Pineapple Shrimp Peppers

PSP2

Using Shrimps in any dish brings out the unique flavor of the sea. I love prawns (popular name for shrimp in India) any way cooked. This recipe I made for community contest, I am part of and there were some rules to cook only specific ingredients. It was a little challenging but I remembered this recipe which was shown sometime back on TV. And trust me you will keep licking your fingers... and will definitely go for a second serving!!! Great as appetizers for parties or serve it with jasmine rice to make a seafood entree. Either way you chose this Pineapple Shrimp Peppers won't let you down.

Adapted from one of the great Indian cooking show 'Khana Khazana' by Sanjeev Kapoor Ji, made some minute changes to adjust to my taste palette.


PSP3

Pineapple Shrimp Peppers

Source: Adapted from Khana Khazna (SK)
Cuisine: Indian Cuisine
Prep time:15 mins Cooking time: 20 mins
Serves: 4 people


Ingredients
2 cups Pineapple, medium chopped
1 1/2 c red and yellow pepper, roughly chopped
2 big cloves of garlic, finely chopped
20-22 large shrimps(optional for vegetarians)
4 tsp sugar
1 tsp crushed red pepper flakes
1 tsp paprika powder
1 tsp garam masala powder
freshly ground black pepper
salt as per taste
1/2 cup water
2 tsp olive oil
Non stick pan for cooking
chopped parsley for garnish

Method
:
  • First heat oil in a nonstick pan, add garlic when oil is little warm. Saute garlic till it changes color.
  • To this add pineapple pieces and mix well, add salt and saute on medium high flame for a minute. Then add sugar and 1/2 cup water, cover with a lid and let it cook for 5 more minutes.
  • Now add the crushed red pepper flakes, paprika powder and garam masala powder and cook until all the water evaporates
  • Time to add the shrimps and red pepper and yellow pepper, you can use any colored pepper(capsicum) like green or orange too! Mix all the ingredients well and add freshly powdered black pepper and check for salt.
  • This dish is ready in no time, Serve it with your favorite rice item or like an appetizer.

PineappleShrimpPeppers1


Thursday, June 23, 2011

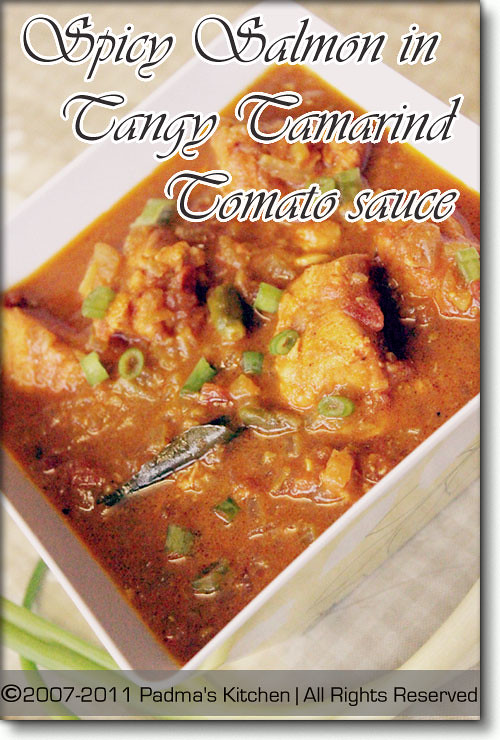
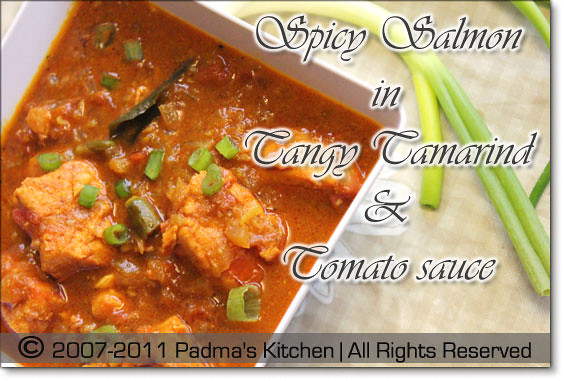
Spicy Salmon in Tangy Tamarind and Tomato sauce

SpicySalmon1

Those were my initial days when I used to search for Indian fish in American waters....errr!!@#.. american fish market or better to put it in words asian fish market on american soil... popularly called as chinese market by "desis" in USA. I was confused by their english names and appearance, Fish in India are little smaller in size here everything is Jumbo size.. I was so tired of searching our Indian fish there too!! .... Then one of my neighbour in India who lives in Connecticut now, listed me some of the English names for Indian fishes... I quickly noted it down in my notepad and every now and then go back to that list, sigh!!!


My friend 'J' is a malyali and you know they are crazy for fish.... he invited us for lunch during our initial days, when I was still learning and exploring other side of this world, country, people and food. That day apart from all the chicken, mutton dishes he made some "Bangada fry" on his grill. I was so happy to see Indian fish on the menu... he laughed and said " arre main tereko list deta hoon, apana desi machi ko idhar doosre naam se bulate hain, don't worry have your food first karke" Amongst that list he told me that Salmon is very good for our heart and has Omega-3, his wife is a doctor!! From then onwards I started having our desi as well as videshi fishes here and enjoying all the flavor and tastes.

Salmon is one of my favorite fish and cooking with this fish is darn easy. This is a very simple and easy way to kick in some spices into the salmon and get the tangy-ness from the tamarind and tomato sauce. You can use any fish except shark!

SpicySalmon2

Spicy Salmon in Tangy Tamarind and Tomato sauce

Source: My Own
Cuisine: Andhra Cuisine
Prep time:15 mins Cooking time: 20 mins
Serves: 4 people


Ingredients:
1 pound/½ kg of salmon fillets (you can use any fish)
3 medium tomatoes, yields 2 cups when chopped

small marble size tamarind (roughly 1 tablespoon)
1 red onion, chopped
3-4 green chillies, chopped
2 tsp freshly crushed garlic and ginger

7-8 curry leaves
½ t turmeric powder
2 T of olive oil/any cooking oil
for marinating the fish
¼ t freshly crushed black pepper
¼ t cumin powder
1 t chilli powder/paprika(adjust according to your spice level)

1 t salt
for garnish
¼ C chopped cilantro
¼ C chopped green onions


Method:
  • Soak the tamarind in ¼ cup hot water for 15 minutes and pulp it out, yields approximately two tablespoon full of the pulp
  • Cut the fish fillet into 2 inches rectangle pieces, add some sea salt and let it sit for 5 mins. Then rinse the salmon fillets and add the rest of the ingredients under 'Marinating' and keep it aside.
  • Chop the onions, tomatoes, green chillies. Heat oil in a kadai or medium sauce pan. Turn the heat to medium and add chopped onion, green chillies and fry till onions are translucent. Add little salt to sweat the onions. Then add curry leaves, crushed garlic and ginger, you can use ginger garlic paste as well. fry for a minute and add chopped tomatoes, mix well and let the tomatoes cook approx 10 mins or so.
  • Once the tomatoes turn out mushy add the turmeric powder and little salt and half cup water and tamarind pulp. Cover with a lid and let it cook further.
  • Once the sauce starts to bubble its time to add the fish. Add the marinated salmon and turn the flame to medium low or simmer, cover and let the fish cook in the sauce for about another 10 minutes.
  • Check for spice and salt, add if needed! Garnish it with chopped cilantro and chopped green onions and serve it with hot steamed rice, Yummm--oo!!

Monday, June 13, 2011

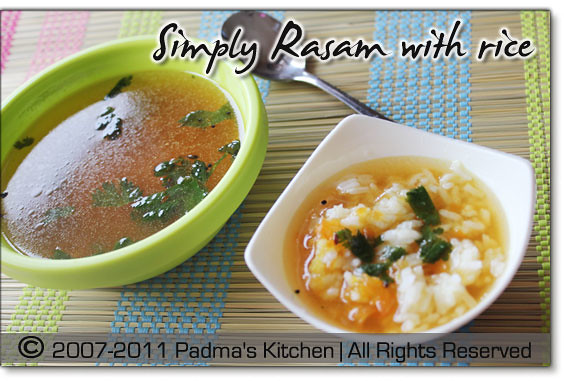
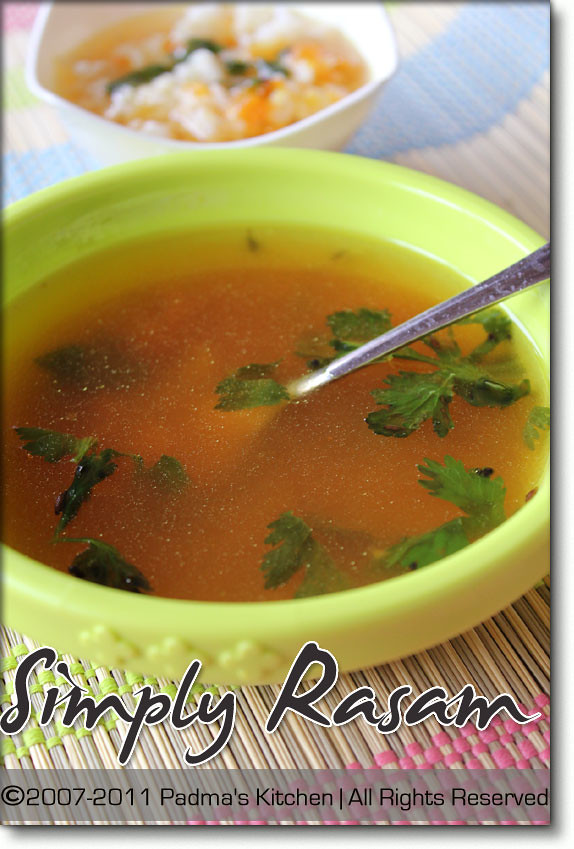
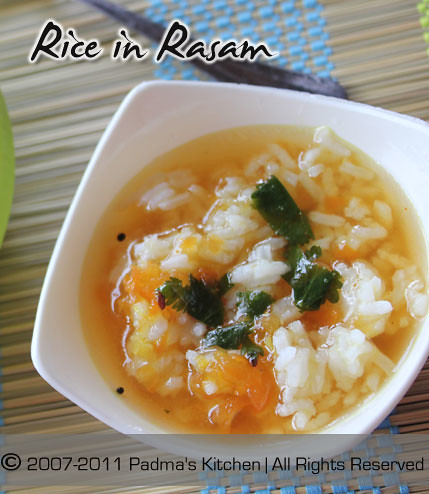
Simply Rasam ~ Ootti Charu

SimplyRasam1

Ootti Charu means Rasam without dal. This one is from my mother's kitchen, another easy, very simple and flavorful recipe to make in a jiff. My Mom used to make it especially as an accompaniment when ever she cooked non-veg dishes like mutton curry, chicken kura or fish curry. She says it helps in clearing your gut after all the spicy, masala food you had and helps with digestion too! Like the way Chinese have tea after their meal!

So, if you are judging that this Ootti charu is only for those who eat non-vegetarian food!! then you are wrong, it goes very well with vegan curries too! I love making it with most of the aloo(potato) curries, vegetable fry's like okra, tindora (dondkaya aka ivy gourd), cauliflower, cabbage, berakaya (ridge gourd), green bananas and kakarakaya (bitter gourd).

This simply rasam has the fewest ingredients yet it is so tasty and full of flavor. The most important ingredient is tamarind and water; we add green chillies, tomatoes and onions, little turmeric and chilli powder with a dash of pepper and cumin powder and little tempering does it all. Here is the step by step recipe in detail.

SimplyRasam2

Simply Rasam

Source: My Mother
Cuisine: Andhra Cuisine
Prep time:10 mins Cooking time: 30 mins
Serves: 6-8 people


Ingredients:
Tamarind (ping pong size ball or roughly ¼ Cup)
6 cups of water
1 medium tomato
few strands of sliced onions (two pinches)
3-4 green chillies, cut lengthwise
½ t turmeric powder
½ t chilli powder/paprika
¼ t freshly crushed black pepper
¼ t cumin powder
salt as required
for tempering/tadka/popu:
2 T cooking oil
½ t mustard seeds/rai
½ t cumin seeds/jeera
½ t split blackgram dal/urad/minapa pappu
7-8 curry leaves
1 T finely chopped onions
2-3 freshly crushed garlic
¼ C chopped cilantro


Method:
  • Soak the tamarind in 1 cup of hot water. After 10 mins pulp the tamarind in the hot water, strain if needed (I use as it is!).
  • Take a medium pot, add this tamarind pulp mixture, 5 cups of water, squeeze tomatoes with clean hands into it(first roughly chop tomato to four pieces and then squeeze). Add green chillies, sliced onions, turmeric powder, chilli powder, crushed pepper, cumin powder and salt.
  • Cook on a medium flame and let it come to a boil, then reduce it to medium low flame and let the flavors simmer a little bit for 10-15 mins or till the green chillies/onions look cooked and not raw. Turn off the flame and temper it!
  • Lastly temper it with seasoning by heating oil in a kadai/round bottom pan add the mustard, cumin seeds, urad dal/black gram dal; wait till the urad dal turns golden brown in color. Then add finely chopped onions and crushed garlic, once the onions turn golden in color add curry leaves and chopped cilantro for 30 seconds or a minute. Immediately pour this tadka/seasoning into Rasam and close with lid. Otti Charu aka Rasam is ready!
SimplyRasam3
  • Serve it with your favorite curry, vegetable fry's and hot steamy rice.
  • This is also best when you have sore throat or cold. Clears your throat and makes you feel good.

Wednesday, June 8, 2011

Sponsored Post - ROASTe

ROASTe.com is a gourmet coffee marketplace which sells gourmet coffee beans. They offer a wide range of speciality beans from all over the globe likewise South America, Central America and Mexico, Africa and Arabia, India and Pacific region giving you more choices to try.

Roaste’s marketplace offers the most extensive selections from artisan roasters and international brands, and includes a wide variety of coffeemakers and accessories. A one stop shop for all the gourmet coffee lovers. You can find from every kind of specialty bean, Kopi Luwak to espresso increasing the choice for those who are passionate about their cup of coffee. There are numerous roasters plugged into their network who ensure your roast-to-order, by insuring freshness and by shipping orders on the day of roasting straight to your door.

ROASTe not only offers great gourmet coffee online, but have programs designed to make every foodie's life more pleasant. Their website includes a coffee community where coffee lovers can communicate and share their knowledge, reviews and experiences. They also offer a wide range of Coffee equipment like coffee makers, espresso machines and coffee accessories. In addition to a well-designed site, they offer reward and incentive programs for repeat customers. Check their website for more information on brands, products, rewards and much more on ROASTe.com
Some of their popular products are:
* Gaggia Classic
* 100% Taste Guaranteed
* Kopi Luwak
* Bialetti Espresso Makers
* Yama Coffee Siphons

Sant'Eustachio Coffee is a gourmet coffee brand, sold on ROASTe.com. Whether your love is espresso, other gourmet coffee, or roast-to-order coffee beans, when you think "best coffee online", try ROASTe.com.


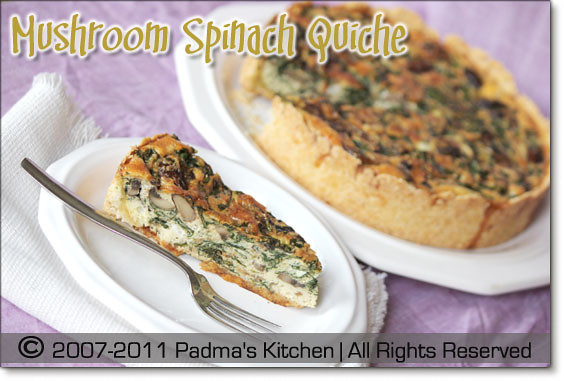
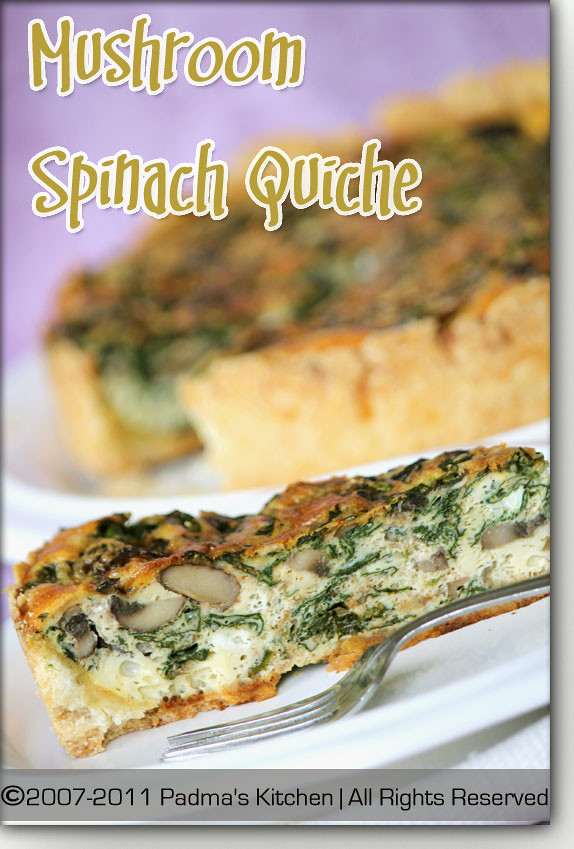
Mushroom Spinach Quiche

MushroomSpinachQuiche1

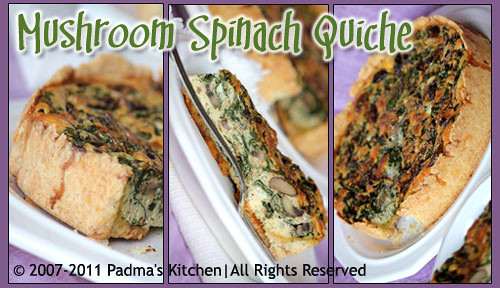
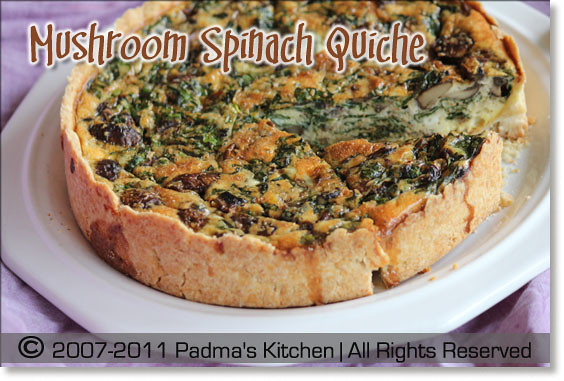
This quiche recipe is another great way to eat veggies as kids love the unique taste when u add cream/whole milk to it along with eggs. I used Egglands best eggs for this recipe. This is a high protein diet for your morning breakfast to boost your metabolism. Perfect for breakfast, brunch as well as for lunch too! If you want to read more about quiche and how the recipe evolved over the years, This post "Formula One" by Momadeon [Coleen] has given very detailed info. I loved the way she writes and kept on reading her blog for a long time until I realize I have to publish this post!!

MushroomSpinachQuiche2

Mushroom Spinach Quiche


Source: My own tried and tested
Prep time: 15 mins
Cooking time: 45 mins
Servings: 8

Ingredients
6 large eggs, beaten
1½ C whole milk/heavy cream
Salt and pepper as per your taste
2 cups chopped fresh baby spinach, packed
1 T olive oil
½ t garlic powder or 1 pod freshly crushed garlic (minced)
1 t paprika powder
½ t cumin powder
1 pound baby bella mushroom, sliced
1½ C shredded cheddar cheese
1 (9-inch) refrigerated pie crust, or my homemade pie crust

Method:
  • Preheat the oven to 375°F[190°C].
  • Heat 1 tablespoon of olive oil in a saute pan. Add crushed garlic or garlic powder and the sliced baby bella mushrooms, you can use white button mushrooms too. Saute till the mushrooms gives out all the moisture. Then add paprika powder and cumin powder to it. Saute for another minute and remove from heat.
  • Combine the eggs, milk/cream, salt, and pepper in a food processor or blender.
  • Layer the spinach, sauted mushroom, and cheese in the bottom of the pie crust, then pour the egg mixture on top. Bake for 35 to 45 minutes until the egg mixture is set. Cut into 8 wedges.
  • Leftovers can be stored in freezer for up to 3 months. Refrigerate the leftover and heat in a microwave for 30 secs when you wanna eat it.
MushroomSpinachQuiche3
Some variations can be done like
  • Use Half & Half instead of cream, or add sour cream instead
  • Use lighter white cheeses or goat cheeses in conjunction with your cheddar
  • Instead of 6 eggs, try 3 whole eggs and 5 egg whites.
  • For additional flavor sprinkle some freshly grated nutmeg to get that unique taste.
  • Add extra or different vegetables: Asparagus, Broccoli, Cauliflower, Sun Dried Tomatoes

Tuesday, June 7, 2011

Easy Homemade Pie Crust

EasyPieCrust

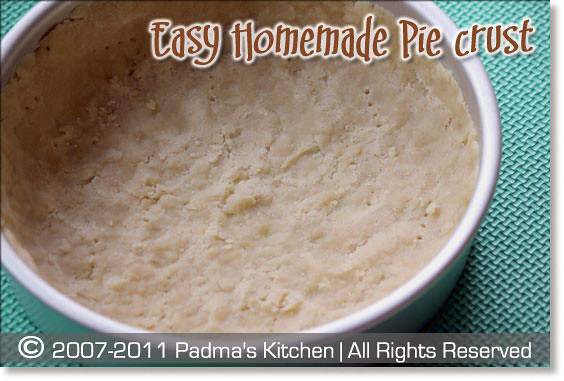
This is a very quick and easy recipe for making pie crust more suitable for savory pies and quiche and not meant for dessert or sweet pies... Very simple and easy. I adapted from Allrecipes.com and made few changes as per the reviews written below in the link. If you are making a sweet dish reduce the salt to half teaspoon. And above all it is homemade.


Recipe source: Allrecipes.com
Prep time: 10 mins
Cooking time: 15 mins
Servings: 8

Ingredients
1½ C All purpose flour (Maida)
2 t sugar
1 t salt
½ C olive oil/vegetable oil
2 T milk

Method:
  • Preheat oven to 400°F (200 °C).
  • Place all ingredients in 9 inch pie pan or a large bowl. Stir together with clean hands.
  • For even layer without bumps, try adding little more milk and olive oil, just eyeball (andaza) it while mixing the flour mixture.
  • Pat mixture into bottom and up the sides of the pie pan. I did not have a pie pan so used round cake pan instead. You can use steel plate or thali which has at least 1.5- 2 inches depth. Poke holes in bottom and side of crust.
  • Bake for 15 minutes in the preheated oven, or until light brown. Use as directed in favorite pie recipe.
MushroomSpinachQuiche

I made this pie crust for mushroom spinach quiche as seen in the above picture. Recipe for the quiche will follow soon.....


Wednesday, June 1, 2011

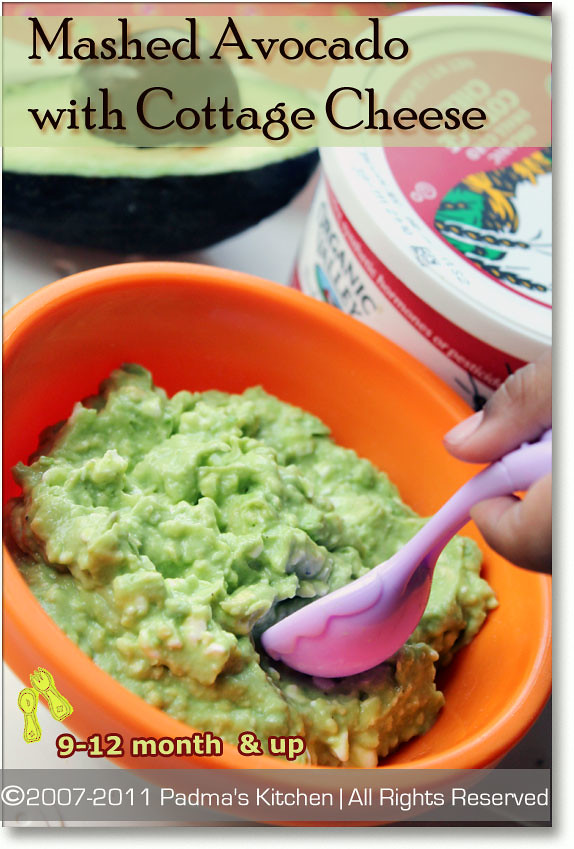
Mashed Avocado and Cottage cheese

Mashed-Avocado550X337

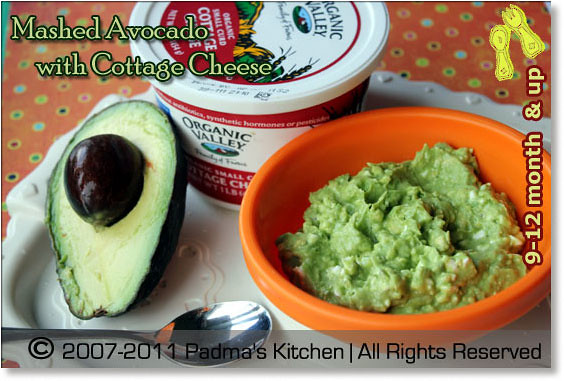
Like I promised in my previous post, presenting here avocado recipe for infants/babies and toddler. We knew that Avocados are so good for everyone but they are helpful for babies too! The fatty acids and unsaturated fats helps in their brain development. Cottage cheese is another source of protein for your little bean! So when combined together; this recipe is an excellent source of calcium, protein and omega3's for the growing needs of your baby.

I introduced avocado to my little one around 10th month, I know it was late; but I was in India (for 4months), so after coming back I tried giving her, I was a bit apprehensive at first, little skeptical if she will like the taste. But she surprised me!! she wanted the whole bowl of freshly mashed avocado!! I was so happy that she enjoyed eating it and eagerly waiting/looking for spoon after spoon. Eventually I tried to give her all sorts of baby food and one day I brought home this book from library called "Everything about Baby food" and it has all the fabulous recipes using cottage cheese. I tried all the different tastes for my little one to see if her taste buds were working perfectly, she ate scrumptiously what ever new recipe I made for her! She was/is a happy child when ever I fed her avocado with mashed cottage cheese. Even today when I was trying to take the pictures for this post my LO was spooning some from the dish. The recipe is very simple and no cooking involved!!

Always use fresh ingredients while feeding your baby. When feeding cheese's or milk products try to buy pasteurized and organic products which are very safe for your baby. As your baby gets older, introduce more variety into her diet by experimenting with these other types of cottage cheese.


Mashed-AvocadoPortrait
You can see in the picture, Anshika is trying to grab a spoonful of her favorite mashed avocado


Mashed Avocado with Cottage Cheese


Servings :2 (depends on the age of your baby)
Ingredients
1/2 ripe avocado
¼ cup organic cottage cheese (I used small curd cottage cheese for this recipe)
pinch of salt and crushed black pepper (optional, if you have not introduced these to your baby/infant)

Method
  • Cut the avocado into half, peel and fork mash it on a plate with cottage cheese and continue fork mashing until the mixture is at desired consistency. Add salt and pepper sparingly.
  • If you feel the mixture is still too chunky, try fork-mashing in some yogurt, breast-milk, or formula.
  • Serve it fresh. If there are any leftovers you can eat that with whole grain bread, used this mixture like a spread or just eat plain.
Check my previous post "Everything about Avocados for Infants, babies and toddlers" for more info on avocados and how to store the other half of avocado.


Related Posts with Thumbnails